
Keeping your vacuum cleaner in top-notch condition is essential for efficient cleaning. In this article, you will discover ten essential tips that will help you clean your vacuum cleaner like a pro. From regular filter maintenance to unclogging the hose, you will learn the tricks of the trade that will extend the lifespan of your appliance and ensure your home remains spotless. Whether you are a seasoned cleaner or just starting out, these cleaning tips will leave you with a cleaner, healthier living space and a vacuum cleaner that performs at its best. Let’s dive into these simple yet effective cleaning techniques and give your vacuum cleaner the care it deserves!
1. Empty the Dust Bag Regularly
1.1 Check the dust bag capacity
The first step in cleaning your vacuum cleaner is to ensure that you regularly check the dust bag capacity. Most vacuum cleaners have a clear indicator that shows when the bag is getting full. Make it a habit to check this indicator before each use, so you know when it’s time to empty the bag.
1.2 Empty the dust bag before it’s completely full
It is important to empty the dust bag before it becomes completely full. A full dust bag can negatively impact the performance of your vacuum cleaner, making it less effective in picking up dirt and debris. Additionally, if the bag is too full, it may cause the motor to overheat. To avoid these issues, empty the dust bag when it is about ¾ full or according to the manufacturer’s instructions.
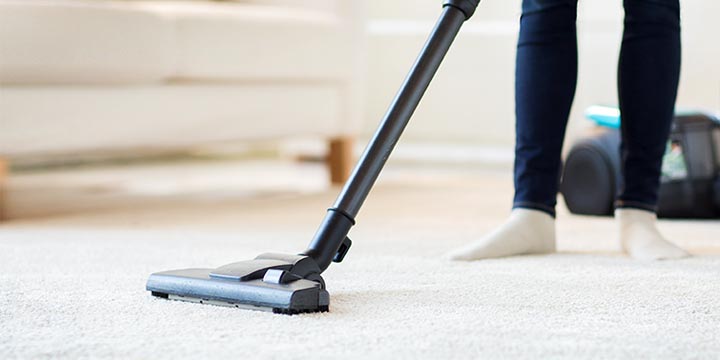
2. Clean or Replace the Filters
2.1 Remove and clean washable filters
Many vacuum cleaners come equipped with washable filters. These filters help to trap dust and allergens, ensuring that the air expelled from the vacuum cleaner is clean. To clean washable filters, simply remove them from the vacuum and rinse them under lukewarm water. Allow the filters to dry completely before placing them back into the vacuum cleaner.
2.2 Replace non-washable filters
Some vacuum cleaners have non-washable filters that need to be replaced periodically. These filters are typically made of paper or cloth material and cannot be cleaned. Check your vacuum cleaner’s manual to determine the recommended replacement schedule for these filters. Regularly replacing non-washable filters will help maintain the air quality in your home and keep your vacuum performing at its best.

This image is property of hips.hearstapps.com.
3. Remove Hair and Debris from the Brushroll
3.1 Use scissors or a comb to remove tangled hair
Over time, the brushroll of your vacuum cleaner can become entangled with hair and other debris. This can hinder the brushroll’s ability to effectively pick up dirt, resulting in decreased performance. To remove tangled hair, carefully use a pair of scissors or a comb to gently untangle the strands. Be cautious not to damage the bristles or the brushroll itself during this process.
3.2 Clear away any debris stuck in the brush bristles
In addition to hair, other types of debris, such as string or fibers, can become lodged in the bristles of the brushroll. To remove these obstructions, use your fingers or a small tool to carefully clear them away. Regularly cleaning the brushroll will ensure that it continues to rotate smoothly and efficiently, maximizing the vacuum cleaner’s cleaning power.
4. Check and Unclog the Hose
4.1 Inspect the hose for clogs or blockages
The hose of your vacuum cleaner can easily become blocked with debris, especially if you frequently vacuum areas with large amounts of dirt or pet hair. Regularly inspect the hose for any signs of clogs or blockages. Look for items that may have become lodged inside, such as larger pieces of debris or foreign objects like toys or coins.
4.2 Remove any obstructions using a long object
If you find any clogs or blockages in the hose, you can use a long object, such as a broom handle or a straightened wire coat hanger, to carefully dislodge the obstruction. Gently push the object through the hose, being mindful not to damage or puncture it. Once the clog has been cleared, the suction power of your vacuum cleaner should be fully restored.

This image is property of cdn.thewirecutter.com.
5. Clean the Attachments
5.1 Wash or wipe down detachable attachments
Most vacuum cleaners come with various attachments, such as a crevice tool or an upholstery brush. These attachments can accumulate dirt and dust over time, so it’s important to clean them regularly. Depending on the material of the attachment, you can either wash it with warm soapy water or simply wipe it down with a damp cloth. Allow the attachments to dry completely before attaching them back to the vacuum cleaner.
5.2 Use a small brush to remove dirt from crevices
Attachments often have small nooks and crannies that can be difficult to clean. To ensure a thorough cleaning, use a small brush, such as a toothbrush or a paintbrush, to gently scrub away any dirt or debris that may be trapped in these crevices. Regularly cleaning the attachments will help maintain their effectiveness and prevent the transfer of dirt from one surface to another.
6. Disinfect the Vacuum Handle and Body
6.1 Use disinfectant wipes or a solution to clean the handle
The handle of your vacuum cleaner is a high-touch area that can harbor germs and bacteria. To keep it clean and hygienic, use disinfectant wipes or a solution specifically designed for cleaning surfaces. Wipe down the handle thoroughly, paying attention to grooves or indentations where dirt can accumulate. This will help prevent the spread of germs and ensure a clean, healthy home environment.
6.2 Wipe down the body with a damp cloth
In addition to the handle, it’s important to clean the body of your vacuum cleaner. Wipe down the exterior surfaces with a damp cloth to remove any dirt, dust, or smudges. Be mindful of any electrical components and avoid getting them wet. Regularly cleaning the body of your vacuum cleaner will not only keep it looking good, but it will also help to maintain its overall performance.

This image is property of learn.allergyandair.com.
7. Check and Replace the Belt
7.1 Inspect the belt for wear and tear
The belt of your vacuum cleaner is responsible for driving the brushroll and maintaining the suction power. Over time, the belt can become worn or stretched, which can affect the overall performance of your vacuum cleaner. Regularly inspect the belt for signs of wear and tear, such as fraying or cracks. If you notice any damage, it’s important to replace the belt promptly.
7.2 Replace the belt if it appears damaged
If you determine that the belt is damaged, refer to your vacuum cleaner’s manual for the specific replacement instructions. Most belts can be easily removed and replaced with a new one. It’s recommended to keep spare belts on hand so that you can quickly replace them as needed. A properly functioning belt is crucial for effective cleaning, so make sure to address any belt issues promptly.
8. Clean the Wheels and Bottom Plate
8.1 Remove any debris stuck in the wheels
The wheels of your vacuum cleaner can accumulate dirt, hair, and other debris as you maneuver it around. Regularly check the wheels for any obstructions and remove them using a small tool or your fingers. This will ensure that the wheels continue to move smoothly and prevent any scratches or marks on your floors as you clean.
8.2 Wipe down the bottom plate to remove dirt and grime
The bottom plate of your vacuum cleaner may come into contact with dirt and grime as you clean different surfaces. To keep it clean, wipe down the bottom plate with a damp cloth or sponge. Pay attention to any brushes or bristles on the plate and make sure they are free from any debris. Cleaning the bottom plate will contribute to the overall efficiency and effectiveness of your vacuum cleaner.

This image is property of www.realsimple.com.
9. Store Your Vacuum Properly
9.1 Wrap the cord neatly and secure it
When it comes to storing your vacuum cleaner, it’s important to keep the power cord organized and secure. Wrapping the cord neatly around the vacuum cleaner’s cord hooks or holders will prevent tangles and damage. Avoid twisting or kinking the cord, as this can weaken the electrical wires. A properly stored power cord will prolong its lifespan and make it easier for you to use your vacuum cleaner in the future.
9.2 Store the vacuum in a clean, dry place
Ensure that you store your vacuum cleaner in a clean, dry environment to prevent any damage from moisture or dust. Moisture can lead to the growth of mold or mildew, while dust can clog filters and other internal components. Find a dedicated storage area that is free from excessive humidity or temperature changes. Prioritize a space that is easily accessible for future use.
10. Schedule Maintenance and Servicing
10.1 Follow the manufacturer’s recommended maintenance schedule
To keep your vacuum cleaner running smoothly and efficiently, it’s essential to follow the manufacturer’s recommended maintenance schedule. This may include tasks such as replacing filters, belts, or other components at specified intervals. By adhering to the maintenance schedule, you can maximize the lifespan of your vacuum cleaner and ensure that it continues to perform optimally.
10.2 Have your vacuum professionally serviced if needed
If you notice any issues with your vacuum cleaner that you are unable to resolve on your own, it may be necessary to seek professional servicing. Trained technicians can diagnose and repair any mechanical or electrical problems that your vacuum cleaner may encounter. Regular professional servicing can help prevent larger and costlier issues from arising, ultimately saving you time and money in the long run.
In conclusion, following these best practices for cleaning your vacuum cleaner will not only help maintain its performance but also contribute to a clean and healthy home environment. By regularly emptying the dust bag, cleaning or replacing filters, removing hair and debris from the brushroll, checking and unclogging the hose, and keeping the attachments and body clean, you can ensure that your vacuum cleaner works efficiently and effectively. Remember to also check and replace belts, clean the wheels and bottom plate, store your vacuum properly, and schedule regular maintenance and servicing. With proper care and maintenance, your vacuum cleaner will continue to serve you well for years to come.

This image is property of learn.allergyandair.com.
