If you want your dishwasher to continue cleaning your dirty dishes efficiently, then you need to pay attention to its water inlet valve. This crucial component controls the flow of water into your dishwasher, and over time, it can get clogged with debris or develop mineral deposits. In this step-by-step guide, you will learn the simple and effective methods to clean and maintain your dishwasher’s water inlet valve, ensuring that your dishwasher continues to work its magic in the kitchen.
A Step-by-Step Guide for Cleaning and Maintaining a Dishwasher’s Water Inlet Valve

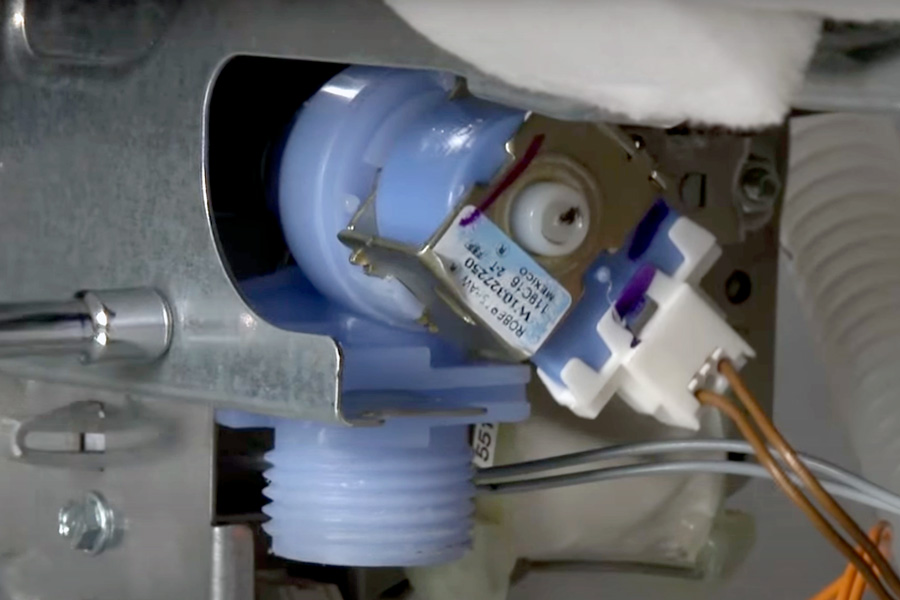
This image is property of www.1tomplumber.com.
Step 1: Gathering the necessary tools and materials
Before you begin cleaning and maintaining your dishwasher’s water inlet valve, it’s important to gather the necessary tools and materials. Here’s what you’ll need:
- Wrench: This will be used to loosen and tighten nuts.
- Bucket: Place the bucket under the water supply line to collect any potential spills during the process.
- Screwdriver: You may need a screwdriver to remove or tighten screws.
- Clean cloth or rag: Use a clean cloth or rag to wipe away any dirt or debris.
- White vinegar: White vinegar is an effective natural cleaner and will be used to soak and clean the valve filter or screen.
- Toothbrush: This will help you scrub away any stubborn dirt or debris.
- Adjustable pliers: These pliers can be useful if you need to loosen or tighten any parts.
Step 2: Turn off the dishwasher and disconnect the power
Before you start working on the water inlet valve, it’s crucial to turn off the power to your dishwasher. Here’s what you need to do:
- Switch off the dishwasher: Locate the power button on your dishwasher and turn it off.
- Unplug the power cord: To ensure your safety, disconnect the power by unplugging the cord from the electrical outlet.

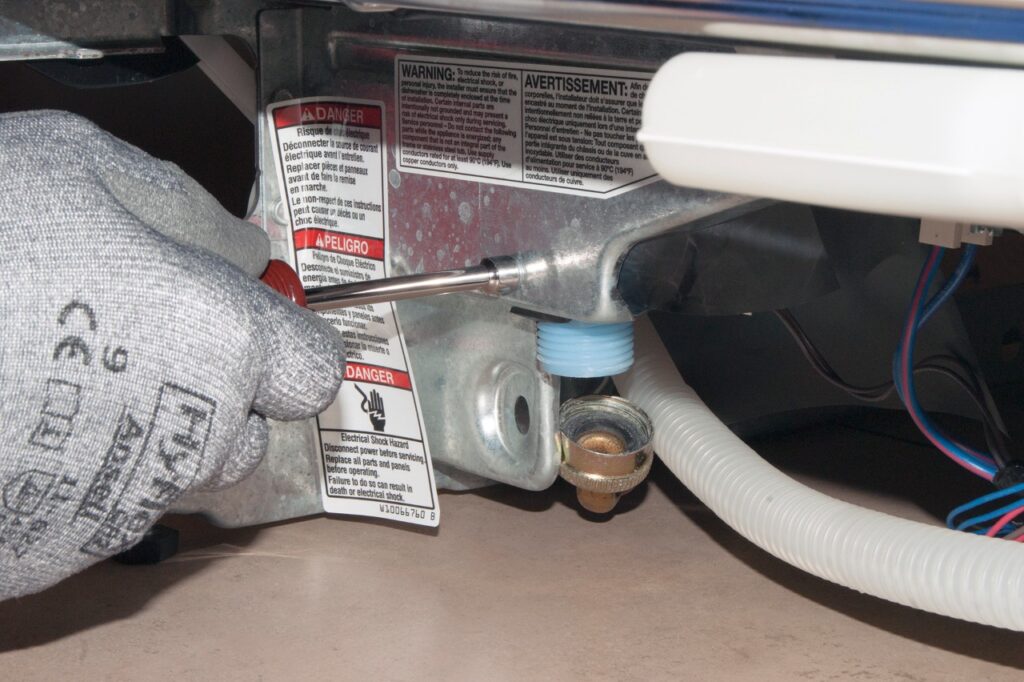
This image is property of library.homeserve.com.
Step 3: Locate the water inlet valve
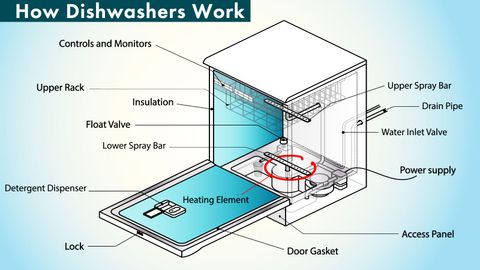
Once you have safely turned off the dishwasher and disconnected the power, it’s time to locate the water inlet valve. The water inlet valve controls the flow of water into the dishwasher. Here’s how you can find it:
- Find the water inlet valve: The water inlet valve is usually located at the bottom of the front panel, underneath the dishwasher. You may need to remove the kickplate at the bottom of the dishwasher to access it.
- Refer to the dishwasher’s manual if unsure: If you’re having trouble locating the water inlet valve, consult the dishwasher’s manual for specific instructions.
Step 4: Prepare for water release
Before you start working on the water inlet valve, it’s important to prepare for potential water release and spills. Follow these steps to ensure a smooth cleaning process:
- Place a bucket under the water supply line: Position the bucket beneath the water supply line to catch any water that may be released when disconnecting the line.
- Have towels ready for potential spills: Keep some towels nearby to quickly clean up any spills or drips that may occur during the process.
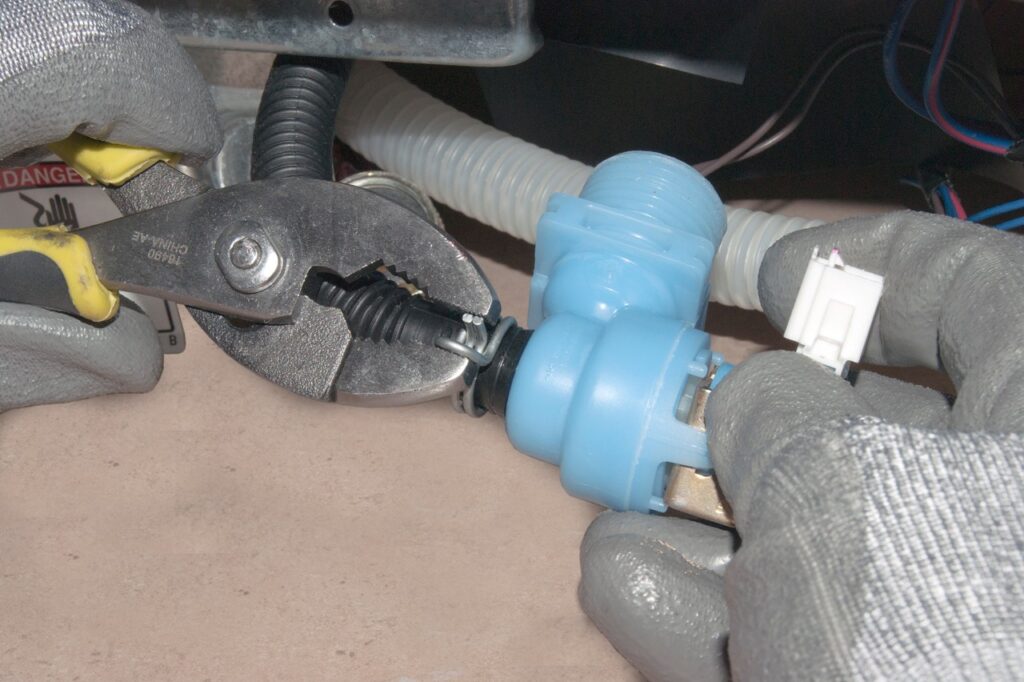
This image is property of media.hswstatic.com.
Step 5: Disconnect the water supply line
Now that you’re prepared, it’s time to disconnect the water supply line from the water inlet valve. Follow these steps carefully:
- Turn off the water supply valve: Locate the shut-off valve on the water supply line and turn it off to stop the water flow to the dishwasher.
- Loosen the nut connecting the water supply line to the valve: Use an adjustable wrench to loosen the nut that connects the water supply line to the water inlet valve. This will allow you to disconnect the line.
- Remove the water supply line: Once the nut is loosened, carefully remove the water supply line from the valve. Be cautious as there may still be some water left in the line.
Step 6: Remove the valve filter or screen
With the water supply line disconnected, it’s now time to remove the valve filter or screen. These components can become clogged with dirt and debris over time, affecting the performance of the water inlet valve. Follow these steps:
- Locate the valve filter or screen: The valve filter or screen is typically attached to the water inlet valve. It may be a cylindrical component with small holes or a mesh-like material.
- Unscrew the filter or screen from the valve: Use your hands or a screwdriver, if necessary, to unscrew the filter or screen from the water inlet valve. Set it aside for cleaning.

This image is property of images.ctfassets.net.
Step 7: Clean the valve filter or screen
Once you have removed the valve filter or screen, it’s important to clean it thoroughly. Here’s how:
- Use a clean cloth or brush to remove debris: Wipe away any visible dirt or debris from the filter or screen using a clean cloth or brush. Ensure you remove as much debris as possible.
- Rinse the filter or screen under running water: Hold the filter or screen under running water to rinse off any remaining dirt and debris. Be thorough in your rinsing to ensure it’s clean and clear.
- Soak it in white vinegar for about 30 minutes: Fill a container with white vinegar and place the filter or screen inside. Let it soak for approximately 30 minutes. The acidic properties of white vinegar will help dissolve any stubborn residue.
Step 8: Clean the water inlet valve
While the valve filter or screen is soaking in white vinegar, it’s a good time to clean the water inlet valve itself. Follow these steps:
- Inspect the valve for any visible dirt or debris: Take a close look at the water inlet valve and check for any dirt or debris that may be blocking the openings or causing performance issues.
- Use a toothbrush soaked in white vinegar to scrub the valve: Dip a toothbrush into the white vinegar and gently scrub the water inlet valve. Pay close attention to the openings and crevices, ensuring they are clean and free from any build-up.

This image is property of images.ctfassets.net.
Step 9: Reassemble the valve and water supply line
Once the valve filter or screen is done soaking in white vinegar, and both the filter and valve are clean, it’s time to reassemble the valve and reconnect the water supply line. Follow these steps:
- Reattach the valve filter or screen: Take the cleaned filter or screen and securely screw it back onto the water inlet valve. Ensure it is tight enough to prevent any leaks.
- Connect the water supply line and tighten the nut: Carefully insert the water supply line back into the valve and use an adjustable wrench to tighten the nut. Make sure the connection is secure, but avoid overtightening to prevent damage.
- Turn on the water supply valve: Once everything is reconnected and tightened, turn on the water supply valve to restore the water flow to the dishwasher.
Step 10: Restore power and test the dishwasher
With the water inlet valve cleaned, reassembled, and the water supply reconnected, it’s time to restore power and test your dishwasher. Follow these steps:
- Plug in the power cord: Reconnect the power cord to the electrical outlet to supply power to the dishwasher.
- Turn on the dishwasher: Locate the power button or switch, and turn on the dishwasher. Ensure all the controls and settings are functioning as expected.
- Run a test cycle to check for proper water flow: Select a suitable test cycle and let the dishwasher run. Verify that water is flowing into the dishwasher properly and there are no leaks or issues with the water inlet valve.
By following these step-by-step instructions, you can effectively clean and maintain your dishwasher’s water inlet valve. This will help ensure proper water flow and prevent any issues that may arise due to dirt or debris accumulation. Remember to refer to your dishwasher’s manual for any additional information or specific instructions.


