Maintaining the cleanliness and functionality of your air fryer is key to enjoying its optimal performance and longevity. In this guide, you will discover simple yet effective tips on how to clean and maintain your air fryer, ensuring that your favorite crispy and delicious dishes are always cooked to perfection. From removing grease and residue to maintaining the heating elements, this article will provide you with all the information you need to keep your air fryer in tip-top shape.
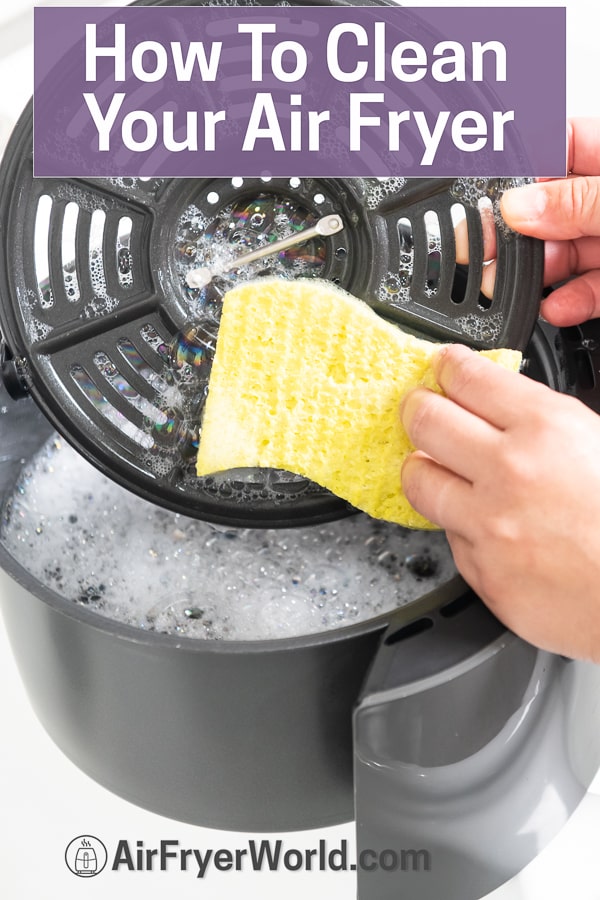
This image is property of airfryerworld.com.
Cleaning Your Air Fryer
To ensure that your air fryer remains in optimum condition and produces delicious, healthy meals every time, it is important to clean and maintain it regularly. Cleaning your air fryer not only keeps it hygienic but also helps to prolong its lifespan. In this comprehensive guide, we will take you through the necessary steps to clean and maintain your air fryer effectively.
Basic Cleaning Supplies
Before we dive into the cleaning process, it is essential to gather the necessary supplies. Here’s a basic list of items you will need:
- Mild dishwashing soap or air fryer cleaner
- Microfiber cloth or soft sponge
- Soft-bristle brush or toothbrush
- Warm water
- Paper towels or a clean dish towel
Having these supplies at hand will make the cleaning process smooth and efficient.
Unplugging and Cooling Down
Before you begin cleaning your air fryer, make sure it is unplugged and has completely cooled down. This will prevent any accidents or injuries while handling the appliance. It is highly recommended to wait at least 30 minutes after use before starting the cleaning process. This ensures that the interior parts are cool to touch and reduces the risk of burns.
Removing and Washing Parts
The first step in cleaning your air fryer is to remove and wash the detachable parts. Most air fryers consist of a basket, a pan, and sometimes additional accessories. These parts need to be thoroughly cleaned after each use to remove any food residue and prevent the build-up of grease.
Start by removing the basket and pan from the air fryer. Use warm, soapy water and a sponge or cloth to wash them. If there are any stubborn food particles stuck on the surfaces, gently scrub them with a soft-bristle brush or toothbrush. Rinse the parts with clean water and dry them thoroughly with a paper towel or dishcloth before reassembling them back into the air fryer.
Cleaning the Interior
After removing the detachable parts, it’s time to clean the interior of your air fryer. Use a damp cloth or sponge with mild dishwashing soap to wipe down the interior walls and surfaces. Pay extra attention to any visible grease or stains. Make sure not to immerse the entire air fryer in water as it may damage the electrical components.
For stubborn stains or grease build-up, you can create a paste using baking soda and water. Apply the paste to the affected areas and let it sit for a few minutes before gently scrubbing with a soft-bristle brush or sponge. Rinse the interior with a clean, damp cloth to remove any residue and wipe it dry.
Cleaning the Exterior
Maintaining the exterior of your air fryer is just as important as cleaning the interior. Wipe the exterior surfaces with a damp cloth to remove any dirt, stains, or fingerprints. Use mild dishwashing soap if necessary, but ensure that the cloth is not dripping wet to avoid any water damage to the electrical components. Dry the exterior thoroughly using a dry cloth or paper towel.
Cleaning the Heating Element
The heating element is a crucial part of an air fryer, as it is responsible for cooking your food. Over time, it can accumulate oil and residue, affecting its efficiency and performance. Therefore, it is essential to clean the heating element regularly.
To clean the heating element, start by ensuring that the air fryer is unplugged and completely cool. Gently remove any loose debris, such as food crumbs or grease, using a brush or cloth. Be careful not to damage the heating element while doing so. If there are stubborn stains or greasy residue, use a soft-bristle brush or toothbrush dipped in warm, soapy water. Gently scrub the heating element and wipe it clean with a damp cloth. Ensure that the heating element is completely dry before plugging in and using the air fryer.
Cleaning the Air Vent
Another crucial component of an air fryer is the air vent. It allows proper airflow and ventilation during the cooking process. It is important to keep the air vent clean to ensure efficient operation and prevent any potential issues.
To clean the air vent, start by unplugging the air fryer and allowing it to cool down completely. Gently wipe the exterior of the air vent with a damp cloth or sponge. Use a soft-bristle brush or toothbrush to remove any dirt or debris that may be trapped in the small openings. Be gentle while cleaning to avoid damaging the vent. Once cleaned, dry the vent thoroughly.
Cleaning the Control Panel
The control panel of your air fryer is where you operate and adjust the settings for cooking. To clean the control panel, use a slightly damp cloth or sponge. Do not use excessive water, as it may damage the electrical components. Gently wipe the buttons and display, removing any dirt or food stains. Dry the control panel thoroughly before using the air fryer again.
Cleaning the Power Cord
The power cord of your air fryer is often overlooked when it comes to cleaning, but it is equally important. Over time, dust, dirt, and residue can accumulate on the power cord, affecting its performance and potentially causing electrical issues.
To clean the power cord, start by unplugging the air fryer. Dampen a cloth with warm soapy water and gently wipe the entire length of the power cord. Ensure that the cloth is not dripping wet to avoid any water damage. Dry the power cord thoroughly before plugging it back in or storing it.
Drying and Assembling
After completing the cleaning process, it is crucial to ensure that all parts are adequately dried before reassembling your air fryer. Wipe the interior and detachable parts with a clean, dry cloth or paper towel to remove any moisture. Allow the parts to air dry for a few minutes, ensuring there is no excess water remaining.
Once all parts are dry, reassemble the air fryer by placing the pan and basket back into the appliance. Ensure that they are properly aligned and securely in place before starting to use the air fryer again.
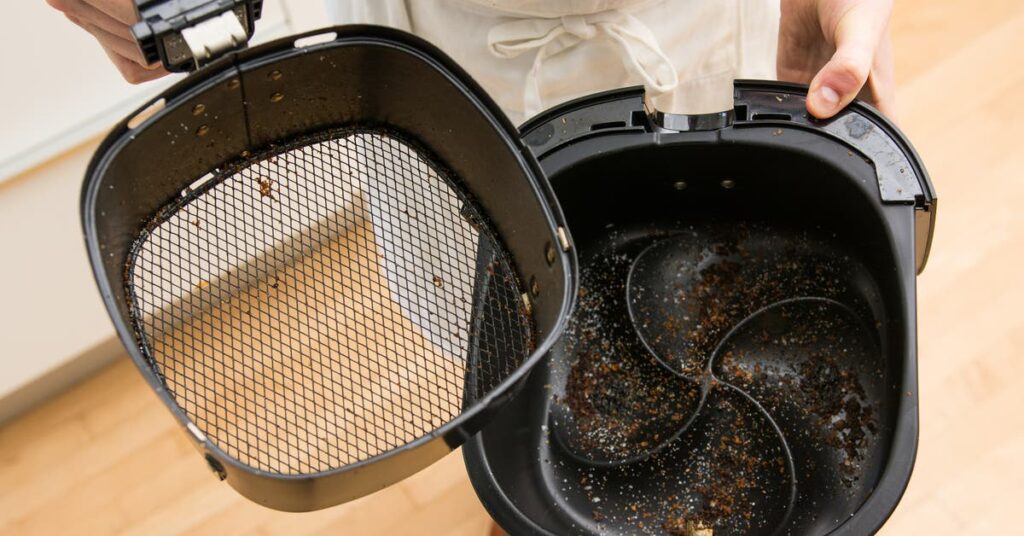
This image is property of cdn.thewirecutter.com.
Deep Cleaning and Maintenance
While regular cleaning is essential, it is also necessary to perform deep cleaning and maintenance on your air fryer periodically. This helps to remove any stubborn stains, grease build-up, and ensures the optimal functioning of your appliance.
Deep Cleaning Supplies
For deep cleaning, you may need additional supplies to tackle the tougher stains and grease. Here’s a list of items that might come in handy:
- Vinegar
- Baking soda
- Lemon juice
- Soft-bristle brush or toothbrush
- Non-abrasive scouring pad
- Pipe cleaners (for hard-to-reach areas)
- Q-tips or cotton swabs
These supplies will assist in thoroughly cleaning your air fryer, leaving it fresh and ready for use.
Deep Cleaning the Basket
To deep clean the basket, start by removing any remaining food particles or residue. Fill a sink or basin with warm water and add a few drops of mild dishwashing soap. Submerge the basket in the water and let it soak for about 15-20 minutes. This softens the stubborn stains and makes them easier to remove.
After soaking, use a non-abrasive scouring pad or soft-bristle brush to scrub away any remaining stains or grease. Pay close attention to the corners and crevices of the basket. For hard-to-reach areas, such as small holes or mesh, use a pipe cleaner or a toothbrush to ensure thorough cleaning. Rinse the basket with clean water and pat it dry with a clean towel before reassembling it back into the air fryer.
Deep Cleaning the Pan
Similar to the basket, deep cleaning the pan involves soaking and scrubbing away any stubborn stains or grease. Fill the sink or basin with warm water and mild dishwashing soap, and let the pan soak for about 15-20 minutes. Use a soft-bristle brush or non-abrasive scouring pad to scrub away the stains. Rinse the pan with clean water and dry it thoroughly before assembling it back into the air fryer.
Deep Cleaning the Heating Element
The heating element can accumulate a considerable amount of grease and residue over time, affecting its performance. Deep cleaning the heating element is crucial to maintain optimal functionality.
To deep clean the heating element, make sure the air fryer is unplugged and completely cool. Use a soft-bristle brush or toothbrush to remove any loose debris. Create a paste using baking soda and water and apply it to the heating element. Let it sit for approximately 15-20 minutes to break down stubborn stains.
Gently scrub the heating element with a soft-bristle brush or sponge, being cautious not to damage the element. Rinse the heating element with a damp cloth or sponge to remove any residue and dry it thoroughly before using the air fryer again.
Deep Cleaning the Interior
Deep cleaning the interior of your air fryer involves a more thorough approach compared to regular cleaning. To begin the deep cleaning process, prepare a mixture of equal parts vinegar and water. Wipe down the interior walls, surfaces, and corners using a soft cloth or sponge soaked in the vinegar solution. Vinegar acts as a natural degreaser and helps to remove any stubborn stains or build-up.
For hard-to-reach areas or crevices, use a toothbrush or pipe cleaner dipped in the vinegar solution. Gently scrub these areas to ensure thorough cleaning. Once cleaned, rinse the interior with clean water and dry it thoroughly before reassembling the air fryer.
Cleaning the Air Vent
Deep cleaning the air vent involves a similar process as in regular cleaning. Ensure the air fryer is unplugged and cooled down before starting. Gently wipe the exterior of the air vent with a damp cloth or sponge. Use a soft-bristle brush or toothbrush to remove any dirt or debris trapped in the vent. Once cleaned, dry the vent thoroughly.
Cleaning the Control Panel
The deep cleaning process for the control panel is the same as in regular cleaning. Use a slightly damp cloth or sponge to wipe down the buttons and display, removing any dirt or food stains. Dry the control panel thoroughly before using the air fryer again.
Cleaning the Power Cord
Deep cleaning the power cord requires the same precautions as regular cleaning. Make sure the air fryer is unplugged before proceeding. Dampen a cloth with warm soapy water and gently wipe the entire length of the power cord. Dry the power cord thoroughly before plugging it back in or storing it.
Extra Maintenance Tips
To keep your air fryer functioning optimally, consider implementing these maintenance tips:
- Regularly clean the air fryer after each use to prevent the build-up of grease and residue.
- Avoid using abrasive cleaners or scouring pads, as they may scratch the surfaces of your air fryer.
- Ensure that the air fryer is completely dry before plugging it back in or using it again to avoid electrical issues.
- Regularly check and clean the air vent to ensure proper airflow and ventilation.
- Remove and wash any additional accessories, such as racks or skewers, according to the manufacturer’s instructions.
- Store your air fryer in a clean and dry location to prevent dust accumulation.
- Periodically inspect the power cord for any signs of damage, such as fraying or exposed wires, and replace if necessary.
Troubleshooting and Repairs
In case you encounter any issues or problems with your air fryer, it is advisable to refer to the manufacturer’s instructions or contact their customer support for assistance. Avoid attempting any repairs yourself if you are not familiar with the inner workings of the appliance, as it may void the warranty or potentially cause further damage.
Remember, proper cleaning and maintenance of your air fryer will not only ensure its longevity but also guarantee that it continues to provide healthy and delicious meals for you and your loved ones. With these comprehensive cleaning and maintenance steps, you can enjoy the benefits of your air fryer for years to come.
This image is property of images.immediate.co.uk.

