
Maintaining the cleanliness and functionality of your built-in ice maker is essential for ensuring a steady supply of ice at all times. In this guide, we will walk you through the necessary steps to clean and maintain your ice maker, helping you avoid any potential issues and keeping your ice maker in top-notch condition. From regular cleaning routines to troubleshooting tips, this comprehensive guide will equip you with the knowledge and tools necessary to keep your built-in ice maker running smoothly. So, let’s get started on the path to a perfectly functioning ice maker that will keep you cool and refreshed all year long!
A Guide to Cleaning and Maintaining Your Built-in Ice Maker
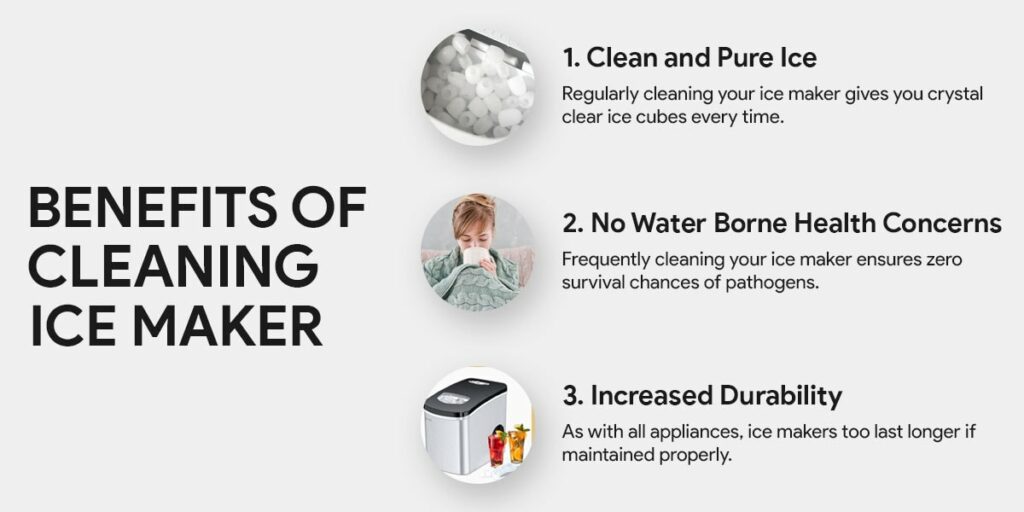
If you’re lucky to have a built-in ice maker, you know how essential it is for keeping your beverages cool and refreshing. However, like any appliance, it requires regular cleaning and maintenance to function optimally. In this guide, we will walk you through the step-by-step process of cleaning and maintaining your built-in ice maker, ensuring it continues to provide you with a steady supply of ice cubes.

This image is property of www.theshabbycreekcottage.com.
Preparation
Gathering necessary supplies
Before diving into the cleaning process, it’s important to gather all the necessary supplies. To clean your ice maker, you will need the following items:
- Warm soapy water
- Sponge or soft cloth
- Vinegar or ice maker cleaner
- Water filter (if applicable)
Having these supplies on hand will save you time and ensure a thorough cleaning process, leaving your ice maker sparkling clean.
Turning off the power
Your safety should always be a top priority, so before starting the cleaning process, make sure to turn off the power to your ice maker. Locate the circuit breaker that controls the ice maker and switch it off. This step will prevent any accidents or damage while you work on cleaning and maintaining your ice maker.

This image is property of cdn11.bigcommerce.com.
Cleaning the Ice Maker
Removing ice and disposing of it
To begin the cleaning process, start by removing any ice that may have accumulated in the ice maker. Simply empty the ice bin and dispose of the ice. This step ensures that you have a clean slate to work with and prevents any contamination of the cleaning solution.
Cleaning the interior with a solution
Now that the ice has been cleared, it’s time to clean the interior of your ice maker. Fill a container with warm soapy water and dip a sponge or soft cloth into the solution. Gently scrub the interior walls, making sure to reach all the nooks and crannies. Pay close attention to the ice mold, as this is where the ice cubes are formed. Rinse the sponge or cloth frequently to remove any residue.
For stubborn stains or lingering odors, you can use a mixture of vinegar and water. Combine equal parts vinegar and water in a container, and use the solution to wipe down the interior. Vinegar is known for its natural cleaning properties and can effectively remove deposits and odors.
Cleaning the exterior and control panel
While you’re at it, don’t forget to clean the exterior surfaces of your ice maker. Wipe down the exterior with a damp cloth to remove any dust or dirt. Pay special attention to the control panel, as it can accumulate fingerprints or spills. Use a soft cloth to gently clean the control panel, ensuring that you don’t get any moisture into the electronics.
Cleaning the water inlet valve and water lines
To maintain the efficiency of your ice maker, it’s crucial to clean the water inlet valve and water lines regularly. Start by disconnecting the power supply to the ice maker. Locate the water inlet valve, which is usually found behind the ice maker or underneath the kitchen sink. Use warm soapy water and a brush to clean the valve thoroughly.
Next, move on to the water lines connected to the ice maker. Gently detach the water lines and flush them with warm soapy water. This will remove any debris or mineral buildup, ensuring a steady flow of clean water to your ice maker. Once cleaned, reattach the water lines securely.

This image is property of www.wikihow.com.
Maintaining the Ice Maker
Regularly checking the ice level
One important aspect of ice maker maintenance is regularly checking the ice level. Take a quick glance at the ice bin to ensure it is not overflowing or running low. Adequate ice levels ensure that your ice maker continues to produce the right amount of ice cubes without any interruptions.
Replacing the water filter
If your ice maker is equipped with a water filter, it’s essential to replace it periodically. Water filters help remove impurities and ensure that your ice cubes are fresh and clean. Refer to the manufacturer’s instructions for the recommended replacement schedule for your specific ice maker model. Replacing the water filter regularly will maintain optimal water quality and prolong the life of your ice maker.
Inspecting and cleaning the condenser coils
To keep your ice maker running efficiently, it’s important to inspect and clean the condenser coils. Over time, dust and debris can accumulate on the coils, hindering the ice maker’s cooling capability. Locate the condenser coils, which are usually located at the back or underneath the ice maker. Gently brush or vacuum off any dust or debris that has accumulated on the coils. This simple task will help your ice maker maintain its performance and prevent any potential breakdowns.
Checking the ice maker’s water supply line
Another crucial maintenance task is checking the ice maker’s water supply line. Inspect the water supply line for any leaks or damage. A damaged water supply line can lead to water leaks and prevent your ice maker from producing ice properly. If you notice any issues with the water supply line, it’s important to have it repaired or replaced promptly to avoid further damage.
Inspecting and cleaning the condenser fan
The condenser fan plays an important role in keeping your ice maker’s components cool. Regularly inspect the condenser fan for any obstructions or debris that may hinder its performance. Using a soft brush or a vacuum cleaner, remove any dust or debris that has built up on the fan blades. This will ensure proper airflow and prevent the ice maker from overheating.

This image is property of pesosice.com.
Troubleshooting Common Issues
Ice Maker not making ice
If your ice maker is not producing ice, there could be a few potential causes. First, ensure that the power supply to the ice maker is turned on and that the water supply is connected and turned on as well. Check that the ice bin is not full or jammed with ice cubes, as this can prevent the ice maker from producing more. If these steps don’t resolve the issue, consult the manufacturer’s manual or contact a professional for further assistance.
Ice cubes are too small or hollow
If your ice cubes are smaller than usual or hollow, it may be an indication of a problem with the water supply. Check the water pressure to the ice maker and ensure that the water inlet valve is fully open. If the issue persists, it may be necessary to have a technician inspect the water inlet valve and water lines for any clogs or blockages.
Ice cubes have an unusual taste or odor
If your ice cubes have an unusual taste or odor, it could be due to the water supply or a dirty ice maker. Start by inspecting and cleaning the water inlet valve and water lines, as they may be harboring bacteria or sediment. If the issue persists, consider replacing the water filter or using a specialized ice maker cleaner to eliminate any unwanted flavors or odors.
Excessive ice build-up in the ice maker
If you notice excessive ice build-up in your ice maker, it could be a sign of a malfunctioning defrost system. Excessive ice build-up can hinder the ice maker’s performance and lead to potential damage. It’s crucial to have a professional inspect and repair the defrost system to ensure the proper functioning of your ice maker.

This image is property of cdn.shopify.com.
Safety Precautions
Disconnecting the power supply
Whenever you’re working on your ice maker, always remember to disconnect the power supply. This simple step ensures your safety and prevents any electrical accidents while cleaning or performing maintenance tasks.
Using protective gloves and eyewear
To protect yourself from any potential hazards, it’s advisable to wear protective gloves and eyewear when cleaning or maintaining your ice maker. This will prevent any injuries and keep your hands and eyes safe from harmful chemicals or sharp objects.
Avoiding the use of harsh chemicals
While cleaning your ice maker, it’s best to avoid the use of harsh chemicals or abrasive cleaners. Stick to warm soapy water, vinegar, or ice maker cleaners specifically designed for this purpose. Harsh chemicals can damage the interior components of the ice maker and negatively impact its performance.
Being cautious with sharp objects
When cleaning or inspecting your ice maker, be cautious of any sharp objects or edges that may cause injury. Take your time and handle any tools or equipment with care to minimize the risk of accidents.
By following these cleaning and maintenance tips, you can ensure that your built-in ice maker remains in top-notch condition, providing you with a steady supply of ice cubes for all your chilled beverages. Regular cleaning and maintenance not only extend the lifespan of your ice maker but also ensure that your ice cubes are clean and free from any unwanted flavors or odors. So, grab your supplies, turn off the power, and give your ice maker the TLC it deserves!


