In this helpful guide, you will learn how to troubleshoot common problems that can arise with your washing machine. From issues with water leakage to a machine that won’t spin, we’ve got you covered. Discover simple steps to diagnose and fix these problems, saving you time and money on unnecessary repair calls. With our easy-to-follow instructions, you’ll be able to get your washing machine back up and running smoothly in no time. Say goodbye to laundry day frustrations and hello to hassle-free washing!
A Guide to Troubleshooting Common Washing Machine Problems
When your washing machine is not functioning properly, it can be a frustrating experience. However, before you call for professional help or rush to replace your machine, there are some troubleshooting steps you can take to identify and potentially fix the issue. In this comprehensive guide, we will walk you through the most common washing machine problems and provide step-by-step instructions on how to troubleshoot each one.

This image is property of assets.searshomeservices.com.
1. Washing Machine Does Not Turn On
1.1. Check the Power Supply
The first thing you should do if your washing machine does not turn on is to check the power supply. Make sure the machine is plugged into a working outlet and that the outlet itself is receiving power. You can test the outlet by plugging another appliance or device into it and see if it works. If the outlet is not receiving power, you may need to check the circuit breaker or call an electrician to fix any wiring issues.
1.2. Inspect the Power Cord
If the power supply is not the issue, the next step is to inspect the power cord. Make sure it is securely plugged into the back of the washing machine and that there are no visible signs of damage such as frayed wires or exposed insulation. If you notice any damage, you will need to replace the power cord.
1.3. Test the Outlet
Sometimes, the problem may lie with the outlet itself. Use a voltage tester to check if the outlet is providing the proper voltage. If not, you may need to replace the outlet or contact an electrician for further assistance.
1.4. Reset the Control Panel
If all else fails, try resetting the control panel of your washing machine. Unplug the machine for a few minutes and then plug it back in. This can sometimes help resolve any temporary glitches or errors that may be preventing the machine from turning on.
2. Washing Machine Drum Not Spinning
2.1. Check for Obstructions
If your washing machine drum is not spinning, the first step is to check for any obstructions. Remove any items that may be stuck between the drum and the tub, such as small clothing items or loose change. Also, check if the drum is properly balanced and not overloaded, as this can also prevent it from spinning.
2.2. Verify the Lid or Door Switch
The lid or door switch of your washing machine plays a crucial role in allowing the drum to spin. If the switch is faulty or not properly engaged, it can prevent the machine from spinning. Check if the switch is properly aligned and functioning correctly. You may need to replace the switch if it is damaged or malfunctioning.
2.3. Examine the Drive Belt
The drive belt transfers power from the motor to the drum, allowing it to spin. If the drive belt is worn out or broken, the drum will not spin. Inspect the belt for any signs of damage, such as cracks or fraying. Replace the belt if necessary.
2.4. Inspect the Motor Coupling
The motor coupling connects the motor to the transmission, enabling the drum to spin. If the motor coupling is broken or worn out, the drum will not spin. Carefully inspect the coupling for any signs of damage. If it is damaged, you will need to replace it.

This image is property of smartcare.com.np.
3. Washing Machine Fails to Fill with Water
3.1. Confirm Water Supply
If your washing machine is not filling with water, the first thing to check is the water supply. Ensure that the water faucets connected to the machine are turned on and providing an adequate water flow. It is also a good idea to check if there are any kinks or blockages in the water supply hoses.
3.2. Check the Water Inlet Valve
The water inlet valve controls the flow of water into the washing machine. If the valve is malfunctioning or blocked, it can prevent the machine from filling with water. Inspect the valve to ensure it is not clogged with debris or damaged. If needed, clean or replace the valve.
3.3. Inspect the Water Level Switch
The water level switch detects the water level in the machine and stops the filling process when the desired level is reached. If the switch is faulty, it may not be signaling the machine to stop filling with water. Check the switch for any signs of damage or malfunction. Replace it if necessary.
3.4. Test the Water Temperature Switch
The water temperature switch controls the water temperature during the washing cycle. If the switch is defective or misaligned, it can affect the water flow into the machine. Test the switch using a multimeter to ensure it is functioning correctly. Replace the switch if it is faulty.
4. Washing Machine Does Not Drain
4.1. Check the Drain Hose
If your washing machine is not draining, start by inspecting the drain hose. Ensure that it is not twisted, kinked, or clogged with debris. Straighten out any kinks and remove any debris that may be obstructing the flow of water.
4.2. Clean the Pump Filter
The pump filter prevents debris from entering the drain pump and causing blockages. If the filter is dirty or clogged, it can restrict the drainage process. Locate the pump filter, which is typically located at the bottom front of the washing machine, and clean it thoroughly.
4.3. Inspect the Drain Pump
The drain pump is responsible for pumping out the water from the washing machine. If the pump is faulty or clogged, the machine will not drain properly. Check the pump for any signs of damage or debris buildup. Clean or replace the pump as needed.
4.4. Verify the Lid or Door Switch
Similar to the drum not spinning issue, the lid or door switch can also affect the drainage process. Ensure that the switch is properly aligned and functioning correctly. Replace it if it is damaged or malfunctioning.
This image is property of authorizedco.com.
5. Washing Machine Leaking Water
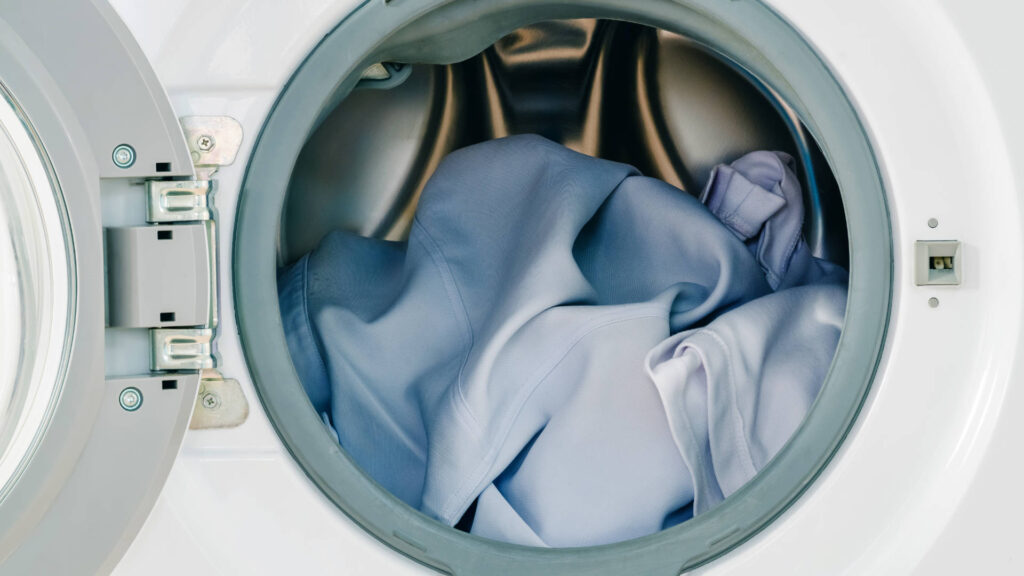
5.1. Examine the Door Seal/Gasket
A common reason for water leakage is a worn-out or damaged door seal or gasket. Inspect the seal/gasket for any visible signs of deterioration or tears. If found, replace the seal/gasket to prevent further leakage.
5.2. Check the Water Inlet Valve
If the water inlet valve is faulty or not closing properly, it can cause water to leak into the machine when it is not in use. Inspect the valve for any signs of damage or malfunction. Replace it if necessary.
5.3. Inspect the Tubing and Hoses
Check all the tubing and hoses connected to the washing machine for any leaks or loose connections. Tighten the connections if necessary and replace any damaged hoses.
5.4. Test the Tub Float
The tub float helps regulate the water level in the washing machine. If the float is damaged or not working correctly, it can cause overfilling and subsequent water leakage. Test the float to ensure it is moving freely and adjust it if necessary. Replace the float if it is damaged.
6. Washing Machine Produces Unpleasant Odors
6.1. Clean the Drum
One of the main reasons for unpleasant odors in a washing machine is a dirty drum. Run an empty cycle with hot water and add a cup of white vinegar to clean the drum. You can also wipe the interior of the machine with a cloth soaked in vinegar to remove any buildup.
6.2. Run a Cleaning Cycle
Many washing machines have a specialized cleaning cycle that helps eliminate odors and residues. Consult your machine’s user manual to find out how to run a cleaning cycle and follow the instructions accordingly.
6.3. Check for Mold or Mildew
Inspect the rubber seal/gasket and other areas prone to moisture for any signs of mold or mildew. If mold or mildew is present, clean it thoroughly using a mixture of water and bleach (follow the manufacturer’s instructions). Regularly wiping down the seal/gasket and leaving the door open after each use can help prevent mold and mildew growth.
6.4. Use Appropriate Detergent
Using too much detergent or using the wrong type of detergent can lead to unpleasant odors. Make sure to use the recommended amount of detergent for your machine and choose a detergent specifically designed for washing machines.

This image is property of keyvendors.com.
7. Washing Machine Vibrating Excessively
7.1. Level the Machine
An unbalanced washing machine can cause excessive vibrations. Ensure that your machine is level by using a bubble level. Adjust the leveling feet or use shims to level the machine if needed.
7.2. Verify the Feet are Secure
Loose or worn-out feet can also contribute to excessive vibrations. Check the feet of the washing machine and tighten them if necessary. If the feet are damaged, consider replacing them.
7.3. Check for Overloading
Overloading the machine with too many clothes can cause it to vibrate excessively. Make sure not to exceed the recommended load capacity of your machine and distribute the clothes evenly inside the drum.
7.4. Inspect the Suspension Springs
The suspension springs of your washing machine help absorb vibrations during the spin cycle. If the springs are damaged or worn out, they may need to be replaced. Inspect the springs and consult your machine’s user manual for guidance on replacing them.
8. Washing Machine Stops Mid-Cycle
8.1. Check the Power Supply
As with the machine not turning on, check the power supply to ensure it is not the cause of the mid-cycle stoppage. Verify that the machine is still receiving power and that the outlet is functioning correctly.
8.2. Inspect the Door or Lid Switch
A faulty or misaligned door or lid switch can cause the machine to stop mid-cycle. Make sure the switch is properly engaged and functioning correctly. Replace the switch if it is damaged or malfunctioning.
8.3. Examine the Timer or Electronic Control Board
If the timer or electronic control board is defective, it can cause the machine to stop mid-cycle. Inspect these components for any signs of damage or malfunction. Replacing the faulty part may be necessary.
8.4. Verify the Water Level Switch
The water level switch, as mentioned earlier, plays a role in determining when to stop filling the machine with water. If the switch is not functioning correctly, it may cause the machine to stop mid-cycle. Test the switch using a multimeter and replace it if necessary.
This image is property of areaappliancerepair.com.
9. Washing Machine Produces Excessive Noise
9.1. Check for Unbalanced Load
An unbalanced load can cause the washing machine to produce excessive noise, especially during the spin cycle. Ensure that the load is properly distributed inside the drum and adjust if necessary.
9.2. Inspect the Shock Absorbers
The shock absorbers help absorb the vibrations and movements of the drum. If the shock absorbers are worn out or damaged, they may need to be replaced. Check the shock absorbers for any signs of wear or damage and replace them as needed.
9.3. Verify the Drive Belt
A worn-out or loose drive belt can cause excessive noise during operation. Inspect the belt for signs of wear or looseness. Replace the belt if necessary.
9.4. Examine the Motor or Bearings
Excessive noise may also result from a faulty motor or worn-out bearings. Inspect the motor and bearings for any signs of damage or wear. Consider seeking professional help if the noise persists or if you are unsure of how to replace these components.
10. Washing Machine Displays Error Code
10.1. Look Up the Error Code in the User Manual
When your washing machine displays an error code, the first step is to consult the user manual. Look up the specific error code you are experiencing and refer to the troubleshooting section of the manual for instructions on resolving the issue.
10.2. Perform a Reset
Sometimes, a simple reset can resolve error codes. Turn off the machine, unplug it from the power outlet, and wait for a few minutes. Then, plug it back in and turn it on. If the error code persists, proceed to the next step.
10.3. Contact Customer Support
If you are unable to resolve the error code on your own, contact the manufacturer’s customer support. They will be able to provide you with further guidance or recommend a professional service technician.
10.4. Call for Professional Repair
If the error code indicates a more serious issue or if you are not comfortable troubleshooting and repairing the machine yourself, it is advisable to call for professional repair. A trained technician will be able to diagnose and fix the problem accurately and safely.
By following these troubleshooting steps, you can save time and money by potentially resolving common washing machine problems on your own. Remember to always prioritize your safety and consult professional help when needed. With proper care and maintenance, your washing machine should continue to provide efficient and reliable service for years to come.


