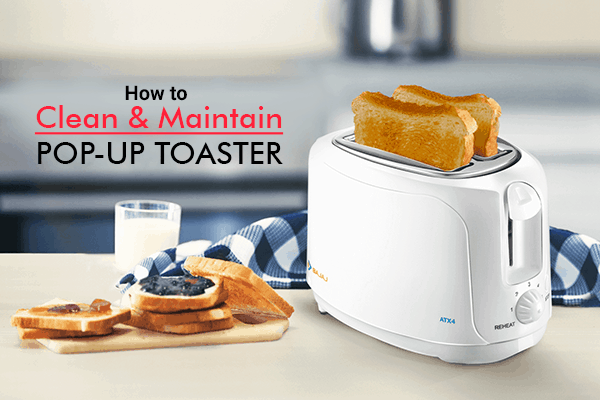
Maintaining and cleaning your toaster doesn’t have to be a tedious task. With a few simple tips, you can ensure that your toaster stays in optimal condition and continues to toast your bread to perfection. From removing crumbs to deep cleaning the interior, this article will provide you with all the guidance you need to keep your toaster running smoothly and your breakfasts delicious. So, grab your cleaning supplies and let’s get started on making your toaster sparkle!

This image is property of cf.ltkcdn.net.
Checking the Power Source
Unplug the toaster before cleaning
Before starting any maintenance or cleaning tasks on your toaster, it is essential to unplug it from the power source. This step ensures your safety and prevents any accidents during the cleaning process. Unplugging the toaster will eliminate the risk of electric shock, as well as protect the internal components from damage.
Inspect the cord for damage
Once the toaster is unplugged, take a close look at the power cord. Inspect it for any signs of damage, such as fraying or exposed wires. A damaged cord can be hazardous and should be replaced immediately to prevent any electrical mishaps. If you notice any issues with the cord, it is advisable to consult a professional for repairs or consider replacing the toaster altogether.
Ensure the outlet is functioning properly
Before plugging the toaster back in, it is crucial to ensure that the outlet you are using is functioning correctly. You can do a quick test by plugging in another appliance or device to see if it receives power. If the outlet is not working, it is necessary to address the issue before using the toaster again. Contacting an electrician is recommended for further troubleshooting and repairs.
Removing Crumbs
Safety precautions
When cleaning your toaster, always prioritize your safety. To avoid any accidents, it is important to take a few safety precautions. Firstly, ensure the toaster is unplugged from the power source. Secondly, allow the toaster to cool down completely before cleaning. Lastly, be cautious when handling the toaster to prevent any cuts or burns.
Use a crumb tray
Most toasters come equipped with a removable crumb tray, which serves as a convenient feature for cleaning. The crumb tray collects any crumbs or debris that fall during toasting. To effectively clean your toaster, you must locate and remove the crumb tray. Refer to your toaster’s user manual to find the specific location of the crumb tray.
Clean the crumb tray
Once you have removed the crumb tray, clean it thoroughly to remove any built-up crumbs. You can wash the crumb tray with warm soapy water, rinse it, and allow it to dry before placing it back into the toaster. Make sure to remove any excess crumbs or residue that might be stuck on the tray.
Remove crumbs from the toaster
After cleaning the crumb tray, it is time to remove any remaining crumbs from inside the toaster. Tilt the toaster upside down over the sink or trash bin, gently tapping it to dislodge the crumbs. You can also use a soft brush or a vacuum cleaner with a brush attachment to remove crumbs from the toaster slots. Be careful not to damage the heating elements or any other internal components in the process.

This image is property of www.sqprofessional.com.
Cleaning the Exterior
Choose a suitable cleaner
To clean the exterior of your toaster effectively, it is important to choose a cleaner that is suitable for the toaster’s material. Most toasters have a stainless steel or plastic exterior. For stainless steel, you can use a stainless steel cleaner or a mixture of warm water and mild dish soap. For plastic exteriors, a gentle all-purpose cleaner or warm soapy water will suffice.
Dampen a cloth or sponge
Once you have chosen the appropriate cleaner, dampen a cloth or sponge with the cleaning solution. Make sure the cloth or sponge is not dripping wet, as excessive moisture can damage the toaster. Squeeze out any excess liquid before proceeding to clean the exterior surface.
Wipe the exterior surface
Using the damp cloth or sponge, gently wipe the exterior surface of the toaster. Pay attention to any areas that may have accumulated dirt, grease, or fingerprints. Use circular motions to effectively remove any stains or residue. Repeat the process if necessary, ensuring that the cloth or sponge is clean and damp throughout.
Remove tough stains
For stubborn stains or dried-on residue, you may need to employ additional cleaning techniques. One option is to create a paste using baking soda and water. Apply the paste to the affected areas and let it sit for a few minutes. Then, use a soft cloth or sponge to gently scrub the stains. Rinse the toaster with a clean damp cloth to remove any residue from the baking soda paste.
Cleaning the Interior
Let the toaster cool down
Safety should always come first when cleaning the interior of your toaster. Allow the toaster to cool down completely before attempting to clean the inside. This will prevent any burns or injuries that may occur from touching hot surfaces.
Use a dry, clean brush
To remove any debris or crumbs from the interior of the toaster, use a dry, clean brush specifically designed for cleaning kitchen appliances. A small, soft-bristled brush works best for this task. Gently sweep the brush along the interior surfaces, paying close attention to the corners and crevices where crumbs tend to accumulate.
Remove stuck-on debris
If you encounter any stuck-on debris or stubborn residue inside the toaster, use a soft cloth or sponge dipped in warm soapy water to loosen it. Gently scrub the affected areas without applying excessive force. Avoid using abrasive materials or harsh cleaning agents, as they may damage the toaster’s interior and heating elements.
Avoid using water
When cleaning the interior of your toaster, it is important to avoid using water directly. Toaster interiors contain electrical components, and moisture can cause damage and pose a safety risk. Stick to dry cleaning methods, such as brushing and wiping with a damp cloth, to ensure the longevity and functionality of your toaster.

This image is property of www.moglix.com.
Cleaning the Heating Elements
Unplug the toaster and let it cool
Cleaning the heating elements of your toaster is crucial for maintaining its performance and longevity. Begin by unplugging the toaster from the power source and ensuring it has had ample time to cool down. Working with the heating elements while they are still hot can lead to burns or other accidents.
Use a soft brush or cloth
To clean the heating elements, you will need a soft brush or cloth. Avoid using abrasive materials that can scratch or damage the heating elements. A soft-bristled brush or a microfiber cloth are ideal options for this task.
Gently wipe the elements
Take the soft brush or cloth and gently wipe the heating elements. Remove any visible debris, crumbs, or residue that may have accumulated on them. Be careful not to apply excessive pressure or bend the heating elements, as they are delicate and may break if mishandled.
Avoid using harsh abrasives
While it may be tempting to use abrasive cleaners or scrub pads to remove tough stains from the heating elements, this should be avoided at all costs. Harsh abrasives can damage the elements, affecting their functionality and potentially creating a safety hazard. Stick to gentle cleaning methods to ensure the longevity and efficiency of your toaster.
Descaling the Toaster
Understand the need for descaling
Over time, mineral deposits and limescale can build up within your toaster, affecting its performance and overall toasting quality. Descaling is the process of removing these deposits and ensuring the toaster functions optimally. Descaling is particularly important if you live in an area with hard water, as mineral deposits tend to accumulate more rapidly.
Prepare a descaling solution
To descale your toaster effectively, you will need a descaling solution. You can either purchase a commercial descaling solution specifically formulated for kitchen appliances or create your own using equal parts water and white vinegar. The acidity of vinegar helps dissolve tough mineral deposits.
Apply the solution to the toaster
Once you have your descaling solution ready, apply it to the exterior and interior surfaces of the toaster that require descaling. Pay close attention to the heating elements and any visible limescale buildup. Use a soft cloth or sponge to apply the solution and allow it to sit for the specified amount of time as indicated on the descaling product.
Rinse the toaster thoroughly
After the descaling solution has had time to work its magic, thoroughly rinse the toaster with clean water. Use a damp cloth or sponge to wipe away any remaining residue. Be sure to remove all traces of the descaling solution to avoid any potential lingering tastes or odors. Once rinsed, allow the toaster to dry completely before use.

This image is property of www.sqprofessional.com.
Maintaining the Toaster
Avoid overfilling the toaster
To ensure that your toaster continues to function optimally, it is important to avoid overfilling it. In other words, do not stuff bread slices or any other food items into the slots. Overfilling can lead to uneven toasting, as well as potential damage to the heating elements and other internal components. Use the toaster as instructed by the manufacturer for best results.
Regularly clean the crumb tray
Cleaning the crumb tray should become a regular part of your toaster maintenance routine. Aim to clean the crumb tray after every few uses or whenever it becomes visibly dirty. By keeping the crumb tray clean, you prevent the accumulation of crumbs and debris, ensuring optimal performance and reducing the risk of fire hazards.
Clean the exterior regularly
In addition to regular crumb tray cleaning, it is essential to clean the exterior of the toaster regularly. Wipe down the exterior surfaces with a damp cloth or sponge to remove any fingerprints, stains, or residue. By maintaining a clean exterior, you not only improve the aesthetic appeal of your toaster but also prevent any potential buildup from affecting its performance.
Clean the interior regularly
Alongside the exterior, it is equally important to clean the interior of your toaster on a regular basis. Regular cleaning of the interior surfaces prevents the buildup of crumbs, grease, and other debris. By maintaining a clean interior, you can extend the lifespan of your toaster while ensuring its ability to produce evenly toasted food items.
Preventing Stickiness
Avoid using sticky substances
To avoid stickiness and prevent difficult cleaning situations, it is best to avoid using sticky substances with your toaster. This includes spreading sticky spreads like peanut butter or honey directly onto your bread before toasting. While it may be tempting to enjoy these delights, they can create a mess and be difficult to remove from the toaster.
Protect the toaster from spills
Accidental spills can happen while using the toaster, especially if you enjoy a cup of coffee or tea alongside your breakfast. To minimize the risk of spilling on the toaster, create a clear workspace and ensure liquids are securely placed away from the toaster. By adopting simple measures, you can prevent sticky situations and reduce the need for extensive cleaning.
Wipe up spills immediately
In the event of a spill, it is crucial to act quickly and wipe up any liquids that come into contact with the toaster. Leaving spills to dry can lead to stickiness and potentially damage the toaster’s exterior or internal components. Take immediate action by using a clean cloth or paper towel to soak up and wipe away any spills.

This image is property of media.cnn.com.
Storing the Toaster
Let the toaster cool down
Before storing your toaster, it is vital to ensure it has cooled down completely. Placing a hot toaster into storage can create a fire hazard and potentially damage nearby objects or surfaces. Allow sufficient time for the toaster to cool down naturally before proceeding with storage.
Clean and dry the toaster
Cleanliness and dryness are key factors when preparing your toaster for storage. Give the toaster a thorough cleaning, both inside and out, using the cleaning methods outlined earlier in this article. After cleaning, make sure the toaster is completely dry before storing it. Moisture can lead to mold, rust, and other damage, compromising the toaster’s functionality.
Find a suitable storage location
When storing your toaster, choose a suitable location that is dry, away from direct sunlight, and free from excessive dust or dirt. It is also wise to store the toaster in a place where it is not likely to be knocked or bumped. A kitchen cabinet or pantry shelf can be an ideal spot to keep your toaster protected until its next use.
Safety Tips
Unplug the toaster when not in use
One of the most important safety tips when it comes to toasters is to always unplug them when not in use. Leaving a toaster plugged in can lead to accidental activation, potentially causing burns or even fires. Get into the habit of unplugging your toaster after each use to prevent any unnecessary risks.
Avoid inserting metal objects
Although it may be tempting to use a knife or a fork to retrieve stuck food items from the toaster, it is crucial to resist the temptation. Inserting metal objects into the toaster can result in a dangerous electrical shock. Instead, use wooden or plastic utensils or turn the toaster off and unplug it before attempting to remove any stuck items.
Keep the toaster away from water
Water and electricity do not mix well, so it is essential to keep your toaster away from water sources. Avoid placing it near sinks or other areas where water can easily splash onto the appliance. This will help prevent electric shocks and potential damage to the internal components of your toaster.
By following these cleaning and maintenance tips, you can keep your toaster in optimal condition, ensuring it toasts your bread and other delicious treats to perfection for years to come. Remember, maintaining a clean and well-functioning toaster not only contributes to the longevity of the appliance but also promotes safety in your kitchen.