Having trouble with your refrigerator? Don’t worry, we’ve got you covered! In this article, you’ll find practical tips and solutions on how to troubleshoot common refrigerator problems. From a noisy fridge to a freezer that won’t freeze, we’ll walk you through step by step, so you can get your fridge back in top-notch condition in no time. Let’s get started!
This image is property of cdn.shopify.com.
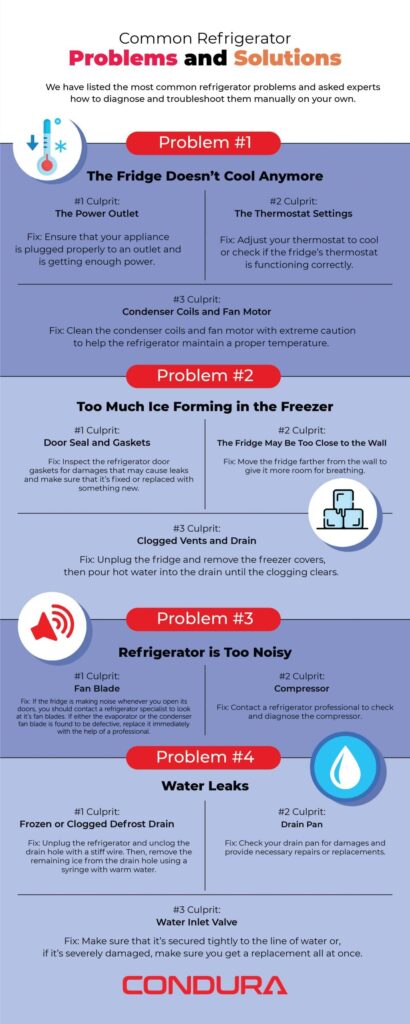
Refrigerator is Not Cooling
Check the Thermostat
If your refrigerator is not cooling properly, the first thing you should check is the thermostat. Make sure that it is set to the correct temperature and hasn’t been accidentally bumped or changed. If the thermostat is set correctly and the refrigerator is still not cooling, you may need to replace the thermostat.
Inspect the Evaporator Fan
The evaporator fan is responsible for circulating the cool air throughout the refrigerator. If it is not functioning properly, the refrigerator will not cool properly. Check to see if the fan is running and listen for any strange noises. If you notice any issues with the evaporator fan, it may need to be cleaned or replaced.
Clean the Condenser Coils
Another common cause of a refrigerator not cooling is dirty condenser coils. Over time, dust and debris can accumulate on the coils, preventing them from properly dissipating heat. Clean the coils using a vacuum or brush to remove any built-up dirt. This simple maintenance task can often solve cooling issues and improve the efficiency of your refrigerator.
Ensure Proper Air Circulation
Proper air circulation is essential for a refrigerator to cool effectively. Check to see if there are any obstructions blocking the air vents inside the refrigerator or behind it. Move any items that may be blocking the vents and allow for proper airflow. Additionally, make sure that the refrigerator is not placed too close to the wall, as this can also restrict airflow and impact cooling performance.
Check for Refrigerant Leak
If all of the above steps have been checked and the refrigerator is still not cooling, there may be a refrigerant leak. A refrigerant leak can cause a significant decrease in cooling performance. If you suspect a refrigerant leak, it is best to contact a professional technician to assess and repair the issue. Attempting to fix a refrigerant leak yourself can be dangerous and may lead to further damage.
Refrigerator is Making Strange Noises
Check the Evaporator Fan Motor
If your refrigerator is making strange noises, the evaporator fan motor may be the culprit. The fan motor is responsible for circulating air throughout the refrigerator and can sometimes become loud or produce unusual sounds if it is faulty or malfunctioning. Inspect the fan motor for any signs of damage or wear. If necessary, replace the motor to resolve the noise issue.
Inspect the Condenser Fan Motor
Another component that can cause strange noises in a refrigerator is the condenser fan motor. The condenser fan motor is located near the compressor and is responsible for cooling the refrigerant. If the motor is damaged, worn out, or covered in dirt and debris, it may make unusual noises. Clean the motor and ensure that it is functioning properly. If the noise persists, consider replacing the motor.
Clean or Replace the Compressor Fan
The compressor fan is another possible source of strange noises in a refrigerator. Over time, the fan blades can become dirty or loose, causing them to produce unfamiliar sounds. Inspect the fan for any signs of dirt or damage, and clean the blades if necessary. If the fan is damaged or the noise continues after cleaning, you may need to replace the compressor fan.
Check for Loose or Faulty Parts
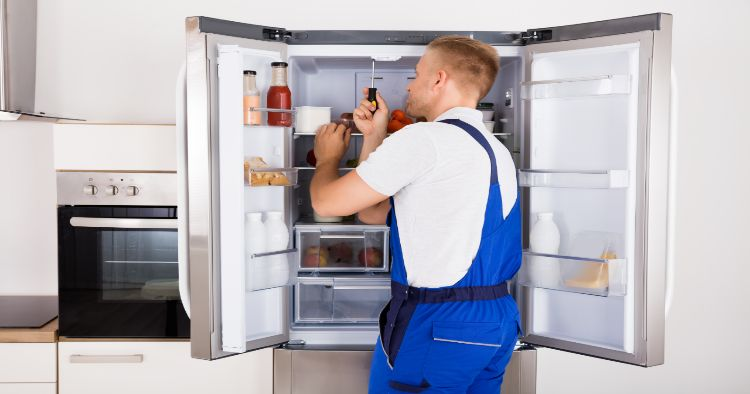
Loose or faulty parts within the refrigerator can also cause strange noises. Check all the components, such as shelves, drawers, and door handles, to ensure they are securely in place. Tighten any loose screws or bolts. If you notice any damaged or worn-out parts, consider replacing them to eliminate the noise.
This image is property of library.homeserve.com.
Refrigerator is Leaking Water
Check the Defrost Drain
If your refrigerator is leaking water, it is essential to check the defrost drain. The defrost drain can become clogged with debris, causing water to back up and overflow onto the floor. Clear any obstructions from the drain using a soft brush or pipe cleaner. If the drain is clear and the leak persists, there may be an issue with the defrost drain heater or a faulty defrost timer. Consider contacting a professional for further assistance.
Inspect the Water Inlet Valve
The water inlet valve is responsible for supplying water to the refrigerator’s ice maker and water dispenser. If it becomes faulty or develops a leak, water can spill onto the floor. Inspect the water inlet valve for any signs of damage or leaks. If the valve is defective, it should be replaced to resolve the water leaking issue.
Replace the Water Filter
A clogged or old water filter can cause water to leak from your refrigerator. Over time, the filter can become saturated with contaminants and impede the flow of water, leading to leaks. Replace the water filter according to the manufacturer’s instructions to ensure proper water flow and prevent leaks.
Check for Cracked or Clogged Drain Pan
The drain pan collects condensed water from the refrigerator and evaporates it. If the drain pan is cracked or clogged, water may leak out instead of evaporating. Inspect the drain pan for any damage or debris and clean it if necessary. If the pan is cracked, it should be replaced to prevent leaks.
Examine the Door Seals
Faulty or worn-out door seals can allow warm air to enter the refrigerator, causing condensation and water leaks. Inspect the door seals for any signs of damage or wear. If you notice any gaps or tears in the seals, they should be replaced to ensure a proper seal and eliminate water leaks.
Refrigerator is Not Dispensing Water or Ice
Check the Water Supply Line
If your refrigerator is not dispensing water or ice, start by checking the water supply line. Ensure that there is a continuous water supply and that the line is not kinked or obstructed. If there are any issues with the water supply line, they should be addressed or repaired to restore water and ice dispensing functionality.
Inspect the Water Inlet Valve
Similar to the previous section, a faulty water inlet valve can also prevent water and ice from being dispensed. Inspect the valve for any signs of damage or blockage. The water inlet valve may need to be replaced if it is defective and causing the dispensing issue.
Examine the Ice Maker Assembly
If the refrigerator is not dispensing ice, the ice maker assembly may be the problem. Inspect the ice maker assembly for any visible damage or blockage that may be preventing ice production. Clean the assembly and ensure that it is functioning correctly. If necessary, replace the ice maker assembly to restore ice dispensing functionality.
Clean or Replace the Ice Dispenser Motor
The ice dispenser motor is responsible for activating the dispenser mechanism to dispense ice. Over time, the motor can accumulate dirt or lose its effectiveness, resulting in the failure to dispense ice. Clean the motor and its surrounding components to remove any debris. If the motor is damaged or continues to malfunction, consider replacing it to solve the dispensing issue.
Check for Frozen Water Line
If the water line leading to the ice maker or water dispenser becomes frozen, it can prevent water flow and result in no water or ice being dispensed. Check the water line for any ice blockages. If frozen, use a hairdryer to thaw the line gently. Once thawed, ensure that the water line is insulated correctly to prevent future freezing.

This image is property of assets.searshomeservices.com.
Refrigerator is Freezing Food
Check the Temperature Setting
If your refrigerator is freezing food, the temperature setting may be too low. Ensure that the temperature is set to an appropriate level that allows for cooling without freezing. Refer to the refrigerator’s manual for recommended temperature settings. Adjust the temperature setting accordingly and monitor the refrigerator to see if the freezing issue is resolved.
Inspect the Temperature Control Thermostat
A faulty temperature control thermostat can cause the refrigerator to run continuously and result in frozen food. Use a multimeter to test the thermostat for continuity. If it does not show continuity when adjusted, replace the thermostat to regulate the temperature properly.
Ensure Proper Air Circulation
Improper air circulation can lead to cold spots in the refrigerator, causing food to freeze. Check for any obstructions blocking the air vents inside the refrigerator and adjust the arrangement of items to allow proper airflow. Rearrange food items to ensure they are not blocking the vents. Additionally, make sure that the refrigerator is not overloaded, as this can restrict airflow and affect temperature regulation.
Examine the Door Seals
Faulty door seals can allow warm air to enter the refrigerator, causing fluctuations in temperature and ultimately freezing food. Inspect the door seals for any signs of damage or wear. If you notice any gaps or tears in the seals, they should be replaced to ensure a tight seal and prevent freezing issues.
Check for Faulty Sensors or Controls
Malfunctioning temperature sensors or controls can disrupt the refrigerator’s ability to maintain the desired temperature. If all other causes have been ruled out, it is advisable to contact a professional technician to inspect and replace any faulty sensors or controls. They will have the necessary expertise to diagnose and fix the issue effectively.
Refrigerator is Not Defrosting
Check the Defrost Timer
A defective defrost timer can prevent the refrigerator from entering the defrost cycle, resulting in a buildup of ice and decreased cooling performance. Locate the defrost timer and manually advance it to see if the refrigerator starts defrosting. If not, the timer may need to be replaced to restore proper defrosting functionality.
Inspect the Defrost Heater
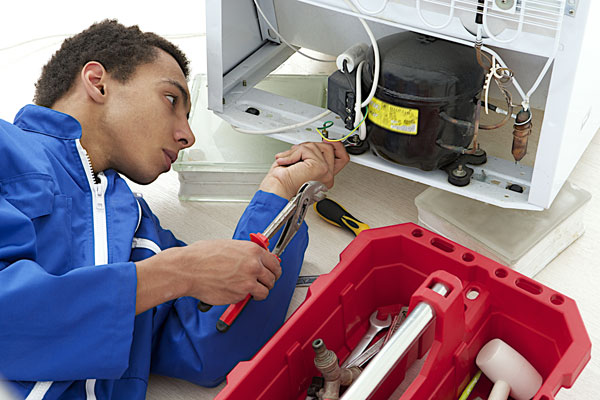
The defrost heater is responsible for melting ice buildup in the refrigerator’s evaporator coils during the defrost cycle. If the heater is burned out or damaged, it will not effectively defrost the coils. Inspect the defrost heater for any signs of damage or continuity using a multimeter. Replace the defrost heater if it is defective to restore normal defrosting.
Clean or Replace the Defrost Sensor
The defrost sensor, also known as the defrost thermostat or bi-metal thermostat, is responsible for monitoring the temperature of the evaporator coils during the defrost cycle. If it is faulty, the refrigerator may not enter the defrost cycle or may not defrost sufficiently. Clean the defrost sensor and ensure that it is properly attached. If the issue persists, replace the defrost sensor.
Examine the Defrost Control Board
The defrost control board is the main control unit for the defrost cycle. If it malfunctions or fails, the refrigerator may have issues with defrosting. Inspect the control board for any visible damage, burnt components, or loose connections. If there are any indications of a faulty control board, it should be replaced to ensure proper defrosting.
This image is property of www.mrright.in.
Refrigerator is Cycling Too Frequently
Check the Temperature Setting
An incorrect temperature setting can cause a refrigerator to cycle too frequently. Verify that the temperature is set to the recommended level. If it is set too low, adjust it to a higher temperature to reduce cycling frequency. Refer to the refrigerator’s manual for guidance on the optimal cooling settings.
Clean or Replace the Condenser Coils
Dirty or clogged condenser coils can lead to a decrease in cooling efficiency, resulting in the refrigerator cycling more frequently. Clean the coils using a vacuum or brush to remove any built-up dust and dirt. If the coils are damaged or excessively dirty, they may need to be replaced to improve cooling performance and reduce cycling.
Inspect the Door Seals
Faulty or worn-out door seals can allow warm air to enter the refrigerator, causing temperature fluctuations and increased cycling. Inspect the door seals for any signs of damage or wear. Replace the seals if you notice gaps or tears to ensure a tight seal and reduce cycling frequency.
Check for Obstructions in the Vent
Blocked vents can restrict airflow and cause the refrigerator to cycle more frequently. Check for any obstructions in the vents both inside the refrigerator and behind it. Clear any items blocking the vents to allow for proper airflow and decrease cycling.
Examine the Thermostat
A malfunctioning thermostat can cause the refrigerator to cycle excessively. Use a multimeter to test the thermostat for continuity and proper functioning. If it is not working correctly, it may need to be replaced to regulate the temperature effectively and reduce frequent cycling.
Refrigerator is Not Running
Check the Power Supply
If your refrigerator is not running at all, the first step is to check the power supply. Ensure that the refrigerator is properly plugged into a functioning power outlet. If it is plugged in but still not running, try plugging in a different appliance to the same outlet to determine if the issue is with the outlet itself. If the outlet is working, there may be an electrical problem within the refrigerator and professional assistance should be sought.
Inspect the Start Relay
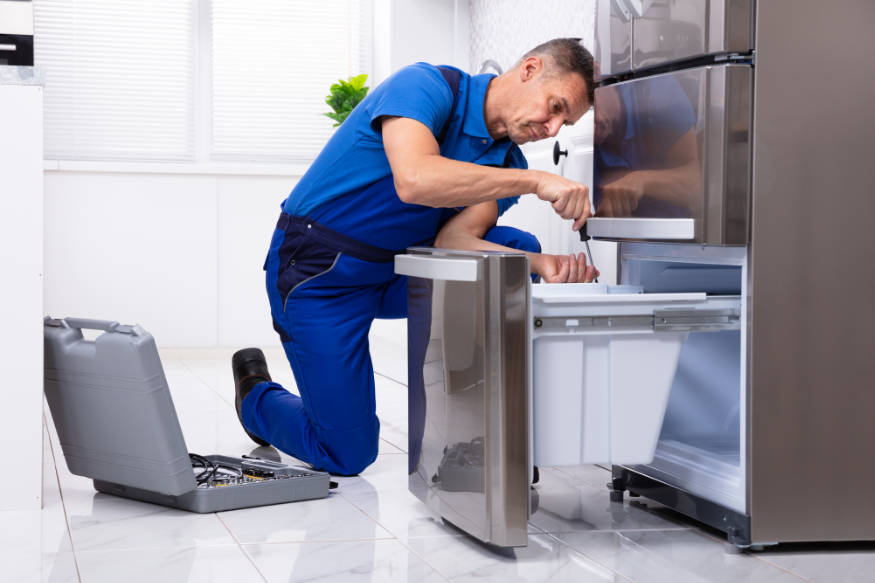
The start relay is responsible for supplying power to the compressor. If it becomes faulty or burnt out, the refrigerator will not run. Inspect the start relay for any signs of damage or burning. If it appears defective, it should be replaced to restore proper operation.
Clean or Replace the Condenser Fan Motor
A dirty or malfunctioning condenser fan motor can cause the refrigerator to stop running. Clean the motor and the surrounding components to remove any dirt or debris. Ensure that the fan blades are not loose or obstructed. If the fan motor is damaged or continues to malfunction, it may need to be replaced to resolve the issue.
Check the Overload Protector
The overload protector is a safety device that prevents the compressor from overheating. If it becomes faulty, it can disrupt the compressor’s operation and cause the refrigerator to stop running. Check the overload protector for any signs of damage or failure. If it is defective, it should be replaced to restore proper functioning.
Examine the Run Capacitor
The run capacitor provides an extra electrical boost to the compressor during startup. If the run capacitor is faulty or defective, it can cause the compressor or entire refrigerator to not run. Inspect the run capacitor for any visible damage or bulging. If it appears defective, replace it to ensure the compressor operates correctly.
This image is property of www.essentialhomeandgarden.com.
Refrigerator is Producing Foul Odor
Clean the Interior
A foul odor in the refrigerator can be caused by spills, spoiled food, or bacterial growth. Start by cleaning the interior of the refrigerator thoroughly. Remove all items from the refrigerator and use warm soapy water to clean the shelves, drawers, and walls. Pay particular attention to any areas where spills or stains are present. Once cleaned, dry the interior thoroughly before placing the food back in.
Check for Spoiled Food
If the refrigerator continues to produce a foul odor after cleaning, you may have spoiled food that needs to be discarded. Check all food items for signs of spoilage, such as a sour smell or unusual texture. Remove any spoiled food immediately to eliminate the odor.
Inspect the Drip Pan
The drip pan is located beneath the refrigerator and collects condensation and other liquids. Over time, this pan can become dirty and develop an unpleasant odor. Inspect the drip pan and clean it thoroughly with warm soapy water. If the drip pan is damaged or cracked, it may need to be replaced to prevent odor buildup.
Clean or Replace the Air Filter
Some refrigerators have an air filter that helps remove odors and keep the refrigerator smelling fresh. Check if your refrigerator has an air filter and locate its position. Remove the filter and clean it according to the manufacturer’s instructions. If the filter is old or damaged, it should be replaced to ensure optimal odor control.
Deodorize with Baking Soda
Baking soda is a natural deodorizer that can help eliminate unpleasant odors in the refrigerator. Place an open box or a small dish filled with baking soda in the refrigerator and leave it for a few days. The baking soda will absorb odors, leaving your refrigerator smelling fresher. Remember to replace the baking soda every few months to maintain its effectiveness.
Refrigerator is Not Lighting Up
Replace the Light Bulbs
If the refrigerator is not lighting up, the first thing to check is the light bulbs. Remove the old bulbs and replace them with new ones of the appropriate wattage and size. Ensure that the bulbs are securely screwed in and make proper contact with the socket. If the bulbs are functional, but the refrigerator still does not light up, move on to the next steps.
Check the Light Switch
The light switch controls the flow of electricity to the refrigerator’s lights. Check the switch to ensure it is in the “on” position and functioning correctly. If the switch is faulty, it may need to be replaced to restore lighting functionality.
Inspect the Door Switch
The door switch is responsible for turning on the refrigerator’s lights when the door is opened. If the switch is malfunctioning or not making proper contact when the door is closed, the lights may not turn on. Inspect the door switch for any signs of damage or wear. If it is faulty, it should be replaced to restore lighting.
Examine the Light Socket
Inspect the light socket for any signs of damage or corrosion. If the socket is damaged, it may not make proper contact with the light bulb, resulting in no lighting. Clean the socket and ensure that it is clean, dry, and undamaged. If necessary, replace the socket to resolve the lighting issue.
Check for Electrical Issues
If none of the above steps resolve the problem, there may be an underlying electrical issue causing the lack of lighting. In such cases, it is best to contact a professional technician who can safely diagnose and repair any electrical issues with the refrigerator. Do not attempt to fix electrical issues yourself, as it can be dangerous.


