Do you ever find yourself frustrated with your vacuum cleaner when it suddenly stops working or doesn’t pick up dirt as efficiently as it used to? Don’t worry, we’ve got you covered! In this article, we will provide you with some simple and effective troubleshooting tips to help you tackle common vacuum cleaner issues. So, if you’re ready to get your vacuum cleaner back in tip-top shape, let’s dive right in!
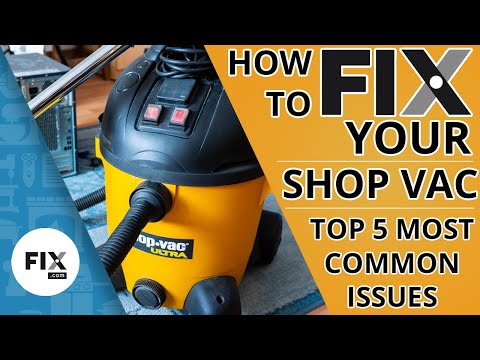
This image is property of i.ytimg.com.
How to Troubleshoot Common Vacuum Cleaner Issues
If you’re experiencing issues with your vacuum cleaner, don’t worry! We’re here to help you troubleshoot and solve many common problems. From a vacuum cleaner that doesn’t turn on to excessive noise or inadequate suction power, we have solutions for you. Let’s dive into each issue and find out what steps you can take to get your vacuum cleaner back in tip-top shape.
Vacuum Cleaner Does Not Turn On
There’s nothing more frustrating than trying to vacuum your floors only to find that your vacuum cleaner won’t turn on. Before you panic, here are a few things you can check:
Check Power Connection
First, ensure that your vacuum cleaner is properly plugged into a working power outlet. Sometimes, the connection can become loose or the cord may not be fully inserted. Double-check the connection to eliminate this as the issue.
Inspect Power Cord
The power cord itself could be the culprit. Over time, cords can become frayed or damaged. Inspect the power cord for any visible signs of wear or damage. If you notice any issues, it’s best to replace the cord for safety reasons.
Reset Circuit Breaker
If you’ve confirmed that the power cord and connection are fine, check your home’s circuit breaker. Sometimes, a tripped circuit breaker can cause your vacuum cleaner to not turn on. Locate the circuit breaker for the area where you plan to use your vacuum and reset it if needed.
Replace or Reset Fuse
In some vacuum cleaners, there may be a fuse that protects the motor from power surges. If your vacuum cleaner has a fuse, check to see if it has blown. If it has, replace it with a new one of the same rating. If your vacuum doesn’t have a fuse, skip this step.
Check On/Off Switch
Lastly, examine the on/off switch on your vacuum cleaner. It’s possible that the switch may be faulty or stuck in the off position. Try toggling the switch a few times to see if it resolves the issue. If not, you may need to have the switch repaired or replaced.
Inadequate Suction Power
One of the most common issues with vacuum cleaners is a loss of suction power. To effectively clean your floors, you’ll want to resolve this problem. Here are a few troubleshooting steps to follow:
Inspect and Empty Dust Bag/Canister
A full or clogged dust bag or canister can greatly reduce the suction power of your vacuum cleaner. Check the bag or canister and empty it if it’s near capacity. While doing so, also look for any obstructions that may be blocking the airflow, such as large clumps of debris.
Clean or Replace Filters
Filters play a crucial role in maintaining suction power and preventing dust and debris from escaping back into the air. Most vacuums have filters that need regular cleaning or replacement. Refer to your vacuum cleaner’s manual to locate the filters and follow the manufacturer’s instructions on how to clean or replace them.
Check for Blockages in Hose or Wand
Sometimes, blockages can occur in the hose or wand of your vacuum cleaner. An obstruction in the airflow path can significantly reduce suction power. Carefully inspect the hose and wand for any debris or clogs. Use a long, flexible tool like a broomstick or a plumbing snake to remove any blockages that you find.
Inspect Brushroll for Tangles
If your vacuum cleaner has a brushroll, tangles and hair wraps can impede its function and decrease suction power. Turn off and unplug your vacuum, then carefully remove any tangled debris or hair from the brushroll. Consider using scissors or a seam ripper to cut through stubborn tangles.
Adjust Height Setting
Vacuum cleaners often come with adjustable height settings to accommodate different floor types. If your vacuum cleaner is struggling to pick up debris, try adjusting the height setting to better match your flooring. A higher setting is suitable for deep carpets, while a lower setting works well for hard floors.
Excessive Noise
Is your vacuum cleaner giving off an unusual amount of noise? Excessive noise can be quite bothersome, but fear not, as there are several steps you can take to quiet things down:
Check for Loose Parts
The first thing you’ll want to do is inspect your vacuum cleaner for any loose parts. Shake or gently move the vacuum to see if any components rattle or move. Tighten screws or fasteners, securing any loose parts you find. This may help reduce vibration and noise levels.
Inspect Brushroll for Debris
A brushroll that has debris trapped inside it can create excessive noise. Turn off your vacuum cleaner and remove the brushroll to inspect it for any debris. Use a pair of scissors or a seam ripper to carefully remove trapped items. Once clean, reattach the brushroll securely.
Replace or Repair Worn Belts
Vacuum cleaners typically have belts that help power the brushroll. If these belts become worn or stretched, they can cause excessive noise and reduced performance. Refer to your vacuum cleaner’s manual to locate the belts and follow the instructions for replacing them. Alternatively, contact the manufacturer for assistance.
Lubricate Moving Parts
Over time, the moving parts of your vacuum cleaner can become dry and cause noise during operation. If you suspect this is the issue, try applying a small amount of lubricating oil to the moving parts. Refer to your vacuum cleaner’s manual for guidance on which parts can be lubricated.
Check for Damaged Fan or Motor
In some cases, excessive noise may be an indication of a damaged fan or motor. If you’ve gone through the previous steps and the noise persists, it’s best to contact a professional repair service or the manufacturer for further assistance. They will be able to diagnose and address any internal mechanical issues.
Vacuum Cleaner Overheating
If your vacuum cleaner becomes hot to the touch during use, it’s likely overheating. Overheating can lead to potential damage or even a breakdown of your vacuum. Here’s what you can do to prevent overheating:
Check for Blockages or Obstructions
Blocked airflow is a common cause of vacuum cleaner overheating. Inspect the airflow path, including the hose, wand, and nozzle, for any obstructions. Remove any debris or blockages you find. Be sure to also check the filters and dust bag/canister for any clogs that could impede airflow.
Allow Vacuum to Cool Down
If your vacuum cleaner has overheated, turn it off and unplug it from the power source. Let it sit in a cool environment for at least 30 minutes, allowing it to cool down completely. Once cooled, you can resume using your vacuum with a lower risk of overheating.
Clean/Replace Filters
Clogged filters restrict airflow, leading to overheating. Regularly clean or replace your vacuum cleaner’s filters to maintain optimal performance. Follow the manufacturer’s instructions for proper cleaning techniques and guidelines for replacing filters. Make sure to allow the filters to dry completely before reinstalling them.
Empty Dust Bag/Canister
A full or nearly full dust bag or canister can prevent proper airflow and cause overheating. Before each use, empty the dust bag or canister to ensure optimal airflow. As with other steps, be on the lookout for blockages or debris while emptying the bag or canister.
Ensure Proper Airflow
Good airflow is essential for preventing overheating. Ensure that any vents or openings on your vacuum cleaner are not blocked by furniture, rugs, or other objects. Make sure there’s enough space around the vacuum for air to flow freely. This will help prevent the motor from overheating.
By following these troubleshooting steps, you can help prevent your vacuum cleaner from overheating and extend its lifespan.
Clogged or Dirty Filters
Dirty or clogged filters can hinder your vacuum cleaner’s performance and reduce suction power. Here’s how to deal with this common issue:
Identify and Locate Filters
Different vacuum models have various types of filters, such as HEPA filters, foam filters, or cloth filters. Refer to your vacuum cleaner’s manual to identify and locate the filters. Common locations include the dust bag/canister compartment, the exhaust area, or behind removable panels.
Clean or Replace Filters
Cleaning or replacing the filters will depend on their type and the manufacturer’s instructions. Some filters can be rinsed with water, while others may require tapping them against a hard surface to dislodge debris. Follow the guidelines provided to keep your filters clean and functioning optimally.
Follow Manufacturer’s Instructions for Cleaning
To ensure you don’t damage the filters, always follow the manufacturer’s instructions when cleaning them. Some filters may be delicate or contain specific materials that require special care. If your vacuum cleaner’s manual is not readily available, you can often find the instructions on the manufacturer’s website.
Allow Filters to Dry Completely
After cleaning the filters, it’s crucial to allow them to dry completely before reinstalling them. Damp or wet filters can impede airflow, cause odors, or even promote mold growth. Place the filters in a well-ventilated area and let them air dry thoroughly for at least 24 hours.
Reinstall Filters Properly
Once the filters are dry, carefully reinstall them according to the manufacturer’s instructions. Be sure to secure them properly to prevent any gaps or leaks that could reduce suction power. Confirm that any locking mechanisms or tabs are engaged to ensure a tight fit.
By regularly cleaning or replacing your vacuum cleaner’s filters, you’ll maintain optimal suction power, prolong the life of the motor, and improve the overall effectiveness of your cleaning routine.
Brushroll Problems
Having issues with your vacuum cleaner’s brushroll can impact its cleaning performance. Here’s what you can do to address brushroll-related problems:
Inspect Brushroll for Tangles
The brushroll can become entangled with hair, string, or other debris. Turn off and unplug your vacuum cleaner, then flip it over to access the brushroll. Look for any tangles or debris wrapped around the brushroll. Carefully remove these obstructions using scissors, a seam ripper, or your fingers.
Remove Debris from Brushroll
Over time, dirt and debris can accumulate around the brushroll’s bristles or end caps. These obstructions can hinder the brushroll’s rotation and reduce cleaning effectiveness. Use a soft brush or cloth to clean the bristles and end caps thoroughly. Be gentle to avoid causing any damage.
Replace Worn or Damaged Brushroll
If your brushroll is excessively worn, the bristles may not effectively agitate the carpet or sweep debris on hard floors. Check the condition of the brushroll for signs of wear or damage, such as frayed bristles or broken parts. If necessary, replace the brushroll with a new one recommended by the manufacturer.
Adjust Brushroll Height
Different flooring types may require different brushroll height settings for optimal cleaning. If your vacuum cleaner has an adjustable brushroll height feature, try adjusting it to match your floor type. Higher settings work well for deep carpets, while lower settings are preferred for hard floors.
Check Belt Tension
The belt that connects the brushroll to the motor can stretch or become loose over time, leading to brushroll problems. Consult your vacuum cleaner’s manual to locate the belt and check its tension. If the belt is loose or worn, it’s best to replace it with a new one to ensure proper brushroll rotation.
By addressing brushroll problems promptly and regularly maintaining the brushroll’s cleanliness, you can optimize the cleaning performance of your vacuum cleaner.
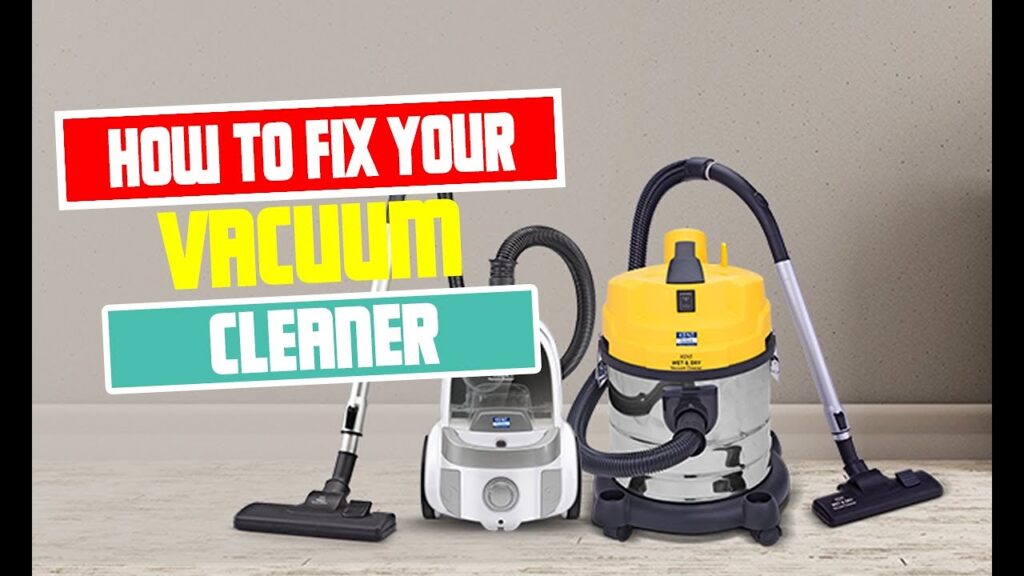
This image is property of i.ytimg.com.
Loss of Power Cord Retraction
If your vacuum cleaner’s power cord no longer retracts as it should, it can be inconvenient and potentially hazardous. Here’s how you can troubleshoot and address this issue:
Inspect Retractable Cord Mechanism
Start by inspecting the retractable cord mechanism located on your vacuum cleaner. Look for any visible signs of damage or obstructions. Sometimes, the cord may simply be tangled within the compartment, preventing it from retracting. Gently disentangle the cord if necessary.
Ensure Proper Cord Placement
Improper cord placement within the retractable compartment can also hinder the retraction function. Make sure the cord is wound evenly and neatly within the designated area, allowing it to freely move and retract without any entanglements. Proper cord placement ensures smooth operation.
Repair or Replace Retraction System
If the retractable cord mechanism is damaged or broken, you may need to repair or replace it. This repair or replacement may involve disassembling parts of your vacuum cleaner, so it’s advisable to consult the manufacturer’s instructions or seek professional help to ensure a proper fix.
Check for Obstructions
Debris or obstructions within the retractable compartment can obstruct the cord’s movement, preventing it from retracting smoothly. Examine the compartment for any dust, dirt, or foreign objects that may be lodged inside. Clean out any debris using a small brush or compressed air, if needed.
By addressing power cord retraction issues promptly and ensuring the mechanism is well-maintained, you can save time and effort during your cleaning routine.
Vacuum Cleaner Smells Bad
A foul odor coming from your vacuum cleaner can quickly turn an otherwise pleasant cleaning experience unpleasant. Here’s how you can eliminate those bad smells:
Clean or Replace Filters
Dirty or clogged filters can produce unpleasant odors as a result of accumulated debris. Refer to the previous section on clogged or dirty filters for instructions on cleaning or replacing them. A clean set of filters will help minimize odors and maintain fresh air circulation.
Empty Dust Bag/Canister
A full or near-full dust bag or canister can cause unpleasant odors to linger in your vacuum cleaner. Regularly empty the bag or canister and dispose of the collected debris properly. Ensure that the bag or canister is completely empty before reattaching it to your vacuum cleaner.
Inspect for Debris or Clogs
Sometimes, small pieces of debris can get stuck within your vacuum cleaner, leading to unpleasant odors. Turn off and unplug your vacuum cleaner, then inspect the hose, wand, and nozzle for any trapped debris. Remove any obstructions, being careful not to damage any components.
Check for Pet Hair Buildup
If you have pets, their hair can accumulate within the brushroll, hose, or other areas of your vacuum cleaner. Pet hair can produce odors over time. Regularly check and clean the brushroll, hose, and other areas where pet hair tends to accumulate to eliminate odors.
Use Odor Neutralizers
If the above steps fail to eliminate the smell, you can try using odor neutralizers or fresheners designed specifically for vacuum cleaners. These products can help neutralize unpleasant odors and leave a pleasant scent behind. Follow the instructions provided with the chosen product for optimal results.
By following these steps, you can keep your vacuum cleaner smelling fresh and clean, ensuring a more enjoyable cleaning experience.
This image is property of media.angi.com.
Uneven Brushroll Rotation
If you notice that your vacuum cleaner’s brushroll is rotating unevenly or not at all, it’s time to troubleshoot the issue. Here’s what you should do:
Check for Blockages or Obstructions
Inspect the brushroll and its surrounding area for any obstructions. Debris, hair, or thread can become tangled in the brushroll, preventing it from rotating correctly. Turn off and unplug your vacuum cleaner, then carefully remove any obstructions you find using scissors or a seam ripper.
Adjust Height Setting
An incorrect brushroll height setting can also cause uneven rotation. Check your vacuum cleaner’s height adjustment feature and ensure it’s set correctly for your specific flooring type. Make height adjustments as needed, ensuring the brushroll has proper contact with the floor to rotate smoothly.
Inspect and Empty Dust Bag/Canister
A full or nearly full dust bag or canister can hinder the brushroll’s rotation due to limited airflow. Empty the bag or canister if necessary and remove any debris that may be obstructing the brushroll’s movement. This will help the brushroll rotate more freely.
Clean or Replace Filters
Dirty or clogged filters can impact the brushroll’s rotation as well. Follow the steps outlined in the section on clogged or dirty filters to clean or replace the filters as needed. Clean filters will ensure optimal airflow, improving the brushroll’s performance.
Inspect Brushroll for Tangles
If the brushroll is tangled with debris, hair, or thread, it will have difficulty rotating evenly. Turn off and unplug your vacuum cleaner, then carefully remove any tangles or obstructions you find. Using scissors or a seam ripper can help you cut through stubborn tangles.
By addressing uneven brushroll rotation promptly and performing regular maintenance, you can solve this issue and keep your vacuum cleaner running smoothly.
Vacuum Cleaner Leaves Behind Debris
If your vacuum cleaner is leaving behind debris or not picking up everything, it may be time to troubleshoot the issue. Here’s what you need to do:
Check for Blockages or Obstructions
Blocked airflow caused by debris or obstructions can prevent your vacuum cleaner from picking up all the debris. Inspect the brushroll, hose, wand, and nozzle for any clogs or trapped debris. Remove any obstructions using a brush, a broomstick, or a plumbing snake, depending on the location.
Adjust Height Setting
An incorrect height setting can result in the brushroll not effectively reaching the floor or carpet. Make sure your vacuum cleaner’s height setting is suitable for your flooring type. Adjust the setting accordingly to ensure optimal contact between the brushroll and the floor. You may need to experiment with different height settings to find the most effective one for your needs.
Inspect and Empty Dust Bag/Canister
A full or nearly full dust bag or canister can hinder your vacuum cleaner’s ability to pick up debris. Before each use, check the bag or canister and empty it if necessary. Remove any accumulated debris that could clog the bag or canister, ensuring unobstructed airflow for optimal cleaning performance.
Clean or Replace Filters
Dirty filters can impede suction power and cause debris to be left behind. Refer to the previous section on clogged or dirty filters for instructions on cleaning or replacing them. Clean filters will help maintain optimal suction power and ensure your vacuum cleaner doesn’t leave any debris behind.
Inspect Brushroll for Tangles
Tangled debris, hair, or thread in the brushroll can interfere with its ability to pick up debris effectively. Turn off and unplug your vacuum cleaner, then carefully remove any tangles or obstructions you find. This will allow the brushroll to spin freely and effectively pick up debris.
By following these troubleshooting steps, you can ensure that your vacuum cleaner picks up all the debris, providing you with the clean floors you desire.
In conclusion, troubleshooting common vacuum cleaner issues doesn’t have to be a daunting task. With the proper knowledge and these troubleshooting steps, you can overcome most problems that may arise. By regularly maintaining your vacuum cleaner and addressing issues promptly, you’ll extend its lifespan and enjoy its cleaning power for years to come. Happy vacuuming!
This image is property of www.northwalesinteriors.co.uk.


