
Maintaining the cleanliness and proper functioning of your clothes dryer is essential to ensure it lasts for years to come. In this article, you will discover a variety of helpful tips and tricks that will guide you through the process of cleaning and maintaining your clothes dryer. From removing lint buildup to inspecting and cleaning vent hoses, you will learn valuable techniques that will keep your dryer running efficiently and reduce the risk of fire hazards. Let’s explore these easy-to-follow steps that will help you keep your clothes dryer in top condition.
This image is property of www.mrappliance.com.
Cleaning the Lint Trap
Why is it important to clean the lint trap?
Cleaning the lint trap is a crucial step in maintaining your clothes dryer. The lint trap collects the lint and debris from your clothes during the drying process, preventing it from clogging the dryer’s ventilation system. Failure to clean the lint trap regularly can result in reduced airflow, longer drying times, and even pose a fire hazard. By regularly cleaning the lint trap, you not only ensure the efficiency and longevity of your dryer but also prioritize the safety of your home.
How often should the lint trap be cleaned?
Ideally, you should clean the lint trap after every load of laundry. This ensures that the buildup of lint is regularly removed, preventing any potential issues with your dryer’s performance. However, if you tend to dry large loads or garments that shed a lot of lint, it’s advisable to check and clean the lint trap halfway through the cycle as well. By making this a habit, you can avoid excessive lint accumulation and maintain optimal dryer performance.
Steps to clean the lint trap
Cleaning the lint trap is a simple and quick process. Follow these steps to ensure proper maintenance and prevent any potential issues:
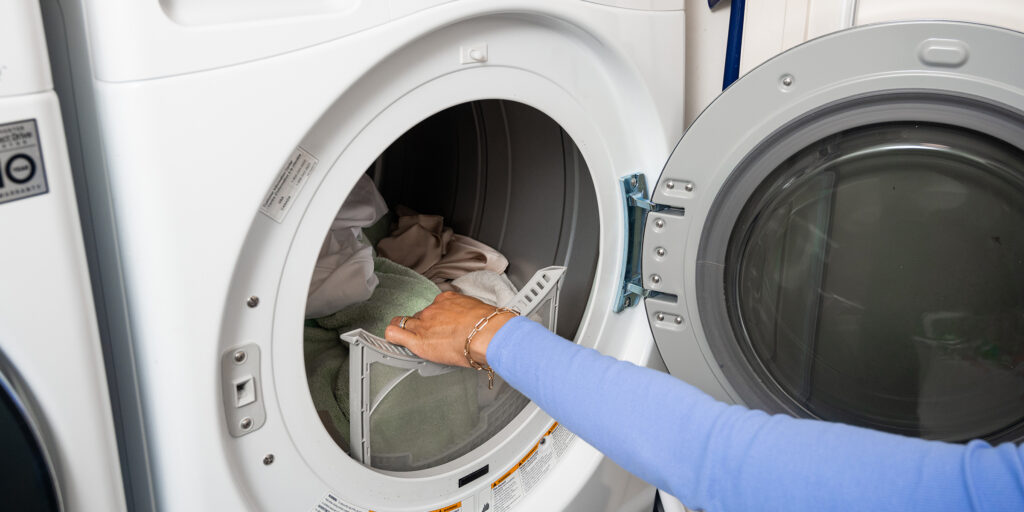
- Locate the lint trap, which is usually located inside the dryer door or on the top panel.
- Pull out the lint trap and remove any visible lint by hand. Make sure to discard the lint properly.
- For a more thorough cleaning, use a lint brush or vacuum attachment to remove any lint that might be stuck in the trap or the surrounding area.
- Once you’ve removed all the lint, give the lint trap a quick rinse under running water to remove any remaining debris.
- After rinsing, make sure the lint trap is completely dry before placing it back into the dryer.
- To finish, run your fingers along the lint trap area inside the dryer to check for any residual lint. If you find any, remove it with your fingers or a lint brush.
Remember, cleaning the lint trap regularly is essential for both the performance and safety of your clothes dryer. Make it a habit after every laundry cycle to keep your dryer running smoothly.
Cleaning the Drum
Why is it important to clean the drum?
Cleaning the drum of your clothes dryer is necessary to maintain its efficiency and ensure the longevity of the appliance. Over time, a residue can build up on the drum’s surface from fabric softeners, dryer sheets, and other laundry products. This residue can cling to clothing, making them appear dull or stained. Additionally, a dirty drum can transfer unwanted odors to your clothes. By regularly cleaning the drum, you can keep your laundry fresh and prevent potential issues.
How often should the drum be cleaned?
Cleaning the drum of your clothes dryer depends on how frequently you use it and the types of laundry products you use. As a general guideline, it is recommended to clean the drum at least once every few months or when you notice a buildup of residue. However, if you notice any stains or strong odors on your clothes, it’s a good idea to clean the drum immediately.
Steps to clean the drum
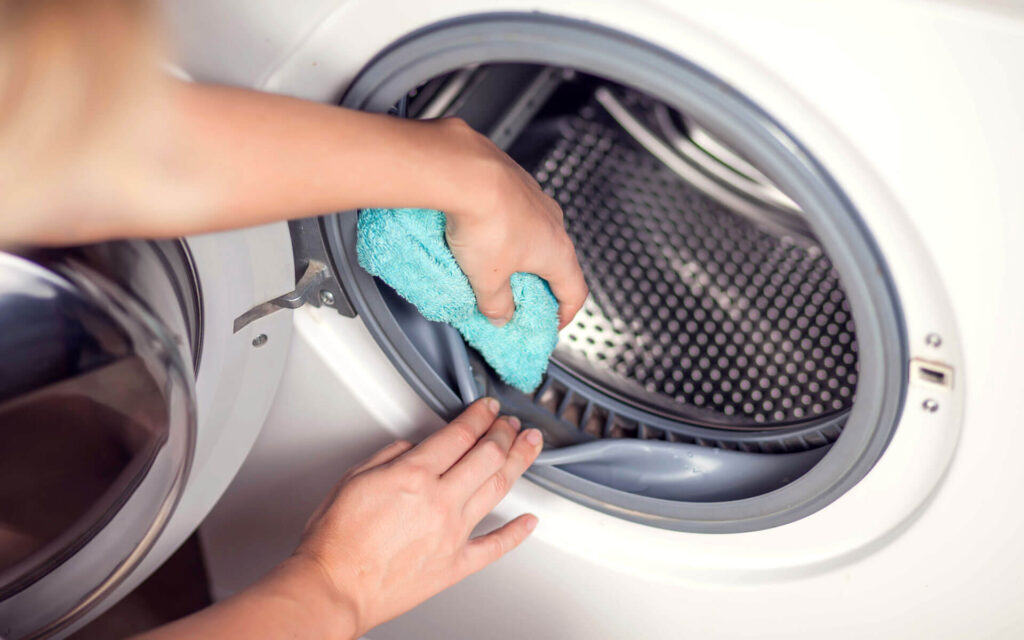
Cleaning the drum of your clothes dryer is a straightforward process. Follow these steps to keep your drum clean and your clothes fresh:
- Start by unplugging the dryer to ensure your safety during the cleaning process.
- Using a damp cloth or sponge, apply a mild detergent or a mixture of warm water and vinegar to clean the drum’s surface. Avoid using abrasive cleaners or harsh chemicals that can damage the drum’s finish.
- Gently scrub the drum, paying extra attention to any areas with visible stains or residue.
- After thoroughly cleaning the drum, rinse the cloth or sponge and wipe the drum again to remove any soapy residue.
- To ensure the drum is completely dry before using the dryer, let it air dry for a few minutes or use a clean, dry cloth to wipe away any remaining moisture.
- Once the drum is dry, plug in the dryer and it’s ready to use.
By following these simple steps, you can maintain a clean and odor-free drum, ensuring the freshness of your clothes with each cycle.
This image is property of mlvtgiqzoszz.i.optimole.com.
Cleaning the Exterior
Why is it important to clean the exterior?
Cleaning the exterior of your clothes dryer not only helps to keep it looking its best but also contributes to its overall performance. Dust, dirt, and lint can accumulate on the exterior surfaces of the dryer, affecting its efficiency and potentially causing overheating. Additionally, a clean and well-maintained exterior can extend the life of your dryer and prevent any potential issues.
How often should the exterior be cleaned?
The frequency of cleaning the exterior of your dryer largely depends on your usage and the environment in which it is located. As a general guideline, aim to clean the exterior once every one to three months. However, if you notice a significant buildup of dust or lint, it’s advisable to clean it more frequently.
Steps to clean the exterior
Cleaning the exterior of your clothes dryer is a simple task that can be done with a few basic household supplies. Follow these steps to keep your dryer looking and performing its best:
- Start by unplugging the dryer as a safety precaution.
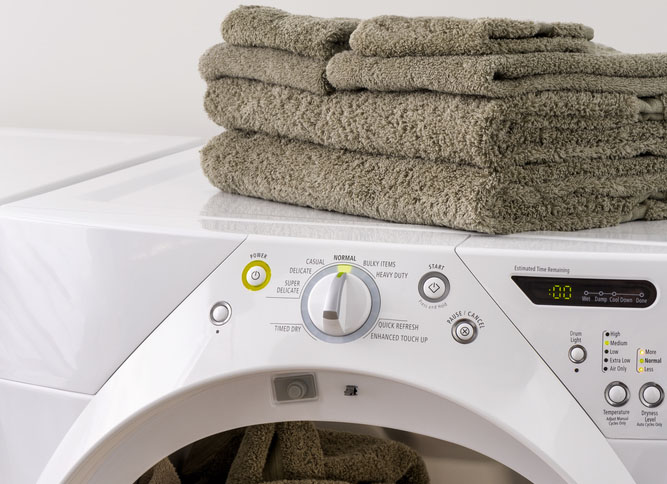
- Using a microfiber cloth or a soft, lint-free cloth, wipe down the exterior surfaces of the dryer, including the control panel, door, and sides.
- For any stubborn stains or dirt, dampen the cloth with mild soapy water and gently scrub the affected areas.
- Pay special attention to areas with buttons, crevices, or vents where dirt or lint can accumulate.
- If there are any removable parts, such as control knobs, remove them carefully and clean them separately.
- After wiping down the dryer, use a clean, dry cloth to remove any remaining moisture and give it a final shine.
- Once the exterior is dry, plug in the dryer, and it’s ready to use.
By regularly cleaning the exterior of your dryer, you not only maintain its appearance but also contribute to its optimal performance and longevity.
Cleaning the Ventilation System
Why is it important to clean the ventilation system?
Cleaning the ventilation system of your clothes dryer is vital to ensure efficient airflow and prevent potential fire hazards. Over time, lint and debris can accumulate in the dryer vent, restricting the flow of air and causing the dryer to work harder. This can lead to overheating and increase the risk of a fire. Regularly cleaning the ventilation system removes lint and debris, promoting proper airflow and reducing the likelihood of dryer-related fires.
How often should the ventilation system be cleaned?
The ventilation system of your clothes dryer should be cleaned at least once a year, or more frequently if you notice any signs of restricted airflow. Factors such as frequent dryer use, long venting runs, and a history of lint buildup may require more frequent cleaning to maintain optimal safety and performance.
Steps to clean the ventilation system
Cleaning the ventilation system of your clothes dryer involves a few simple steps. Follow these steps to ensure proper airflow and minimize the risk of fire:
- Start by unplugging the dryer and moving it away from the wall to access the venting system.
- Disconnect the vent hose or duct from both the dryer and the exterior vent opening. Depending on your setup, you may need a screwdriver or clamps to loosen the connections.
- Inspect the vent hose or duct for any visible lint or debris. Use a lint brush or vacuum attachment to remove the buildup.
- Clean the exterior vent opening by removing any visible lint or debris. Make sure the vent cover is free of obstructions and can open and close easily.
- For a more thorough cleaning, consider using a specialized dryer vent cleaning kit. These kits typically include long flexible brushes or rods that can reach deep into the venting system, removing lint and debris.
- Once the interior and exterior vents are cleaned, reattach the vent hose or duct securely.
- Finally, plug in the dryer and gently push it back into place, ensuring there is no kinking or restrictions in the venting system.
Regularly cleaning the ventilation system helps to maintain the safety and efficiency of your clothes dryer. By dedicating a little time to this important task, you can enjoy worry-free drying while reducing the risk of potential fire hazards.
This image is property of cdn.frontdoorhome.com.
Maintaining Proper Ventilation
Why is proper ventilation important for a clothes dryer?
Proper ventilation is essential for a clothes dryer to function efficiently and safely. Without adequate airflow, the dryer’s performance can be compromised, leading to longer drying times and potential overheating. Insufficient ventilation can also increase the risk of lint buildup, which can clog the venting system and pose a fire hazard. By maintaining proper ventilation, you ensure optimal drying results and reduce the chances of dryer-related issues.
How to ensure proper ventilation?
Ensuring proper ventilation for your clothes dryer involves a few key considerations. Follow these tips to maintain adequate airflow and protect your dryer:
- Ventilation System Installation: When installing your dryer, make sure the ventilation system is properly installed, following the manufacturer’s guidelines. Ensure that the vent hose or duct is securely connected to both the dryer and the exterior vent opening.
- Short and Straight Venting: Whenever possible, use the shortest and straightest venting route for your dryer. Avoid excessive bends or long venting runs that can restrict airflow.
- Ventilation System Inspection: Regularly inspect the vent hose or duct for any signs of damage, such as tears, kinks, or sagging. If you notice any issues, repair or replace the damaged ventilation components promptly.
- Clear Surrounding Area: Ensure that the area around the dryer is clear of any obstructions that could hinder airflow. Remove any lint, dust, or debris that might accumulate near the dryer, obstructing proper ventilation.
- Avoid Overloading: Avoid overloading the dryer with too many clothes, as this can restrict airflow. Follow the manufacturer’s guidelines for load capacity to ensure proper drying and ventilation.
- Clean and Maintain Vents: Regularly clean the lint trap and ventilation system to remove lint and debris. This promotes optimal airflow and reduces the risk of fire hazards.
By following these measures, you can effectively maintain proper ventilation for your clothes dryer, ensuring efficient performance and minimizing the potential for problems.
Maintenance tips for ventilation system
In addition to ensuring proper ventilation, there are a few maintenance tips that can help you keep your dryer’s ventilation system in top shape:
- Regular Inspection: Periodically check the exterior vent opening to ensure it opens and closes freely. Remove any obstructions, such as leaves or debris, that may accumulate on the vent cover.
- Monitor Drying Time: Keep an eye on the drying time for each load. If you notice that it takes longer than usual to dry your clothes, it could be a sign of a clogged venting system. Promptly address any issues to prevent reduced performance and potential fire hazards.
- Professional Cleaning: Consider hiring a professional dryer vent cleaning service to perform a thorough cleaning of your ventilation system. They have specialized equipment that can reach deep into the venting system, removing any stubborn lint or debris that may be out of reach.
- Educate Household Members: Ensure that all household members are aware of the importance of proper dryer vent maintenance. Encourage them to clean the lint trap after each load and inform you if they notice any issues with the dryer’s performance or airflow.
By incorporating these maintenance tips into your routine, you can help prevent potential problems with your dryer’s ventilation system and ensure the safety and efficiency of your appliance. Remember, regular maintenance is key to a properly functioning and safe clothes dryer.
Checking and Cleaning the Exhaust Duct
Why is it important to check and clean the exhaust duct?
Checking and cleaning the exhaust duct of your dryer is essential to maintain proper airflow and prevent fire hazards. The exhaust duct is responsible for venting the hot air and moisture outside your home. Over time, lint and debris can accumulate in the exhaust duct, restricting the flow of air and increasing the risk of a fire. Regularly checking and cleaning the exhaust duct ensures efficient ventilation and reduces the potential for dryer-related fires.
How often should the exhaust duct be checked and cleaned?
It is recommended to check and clean the exhaust duct of your clothes dryer at least once a year. However, if you notice any signs of restricted airflow or your dryer is used frequently, it’s advisable to check and clean the exhaust duct more frequently. Factors such as long duct runs, bends, or a history of lint buildup may require more frequent cleaning to maintain optimal safety.
Steps to check and clean the exhaust duct
Checking and cleaning the exhaust duct of your clothes dryer involves a few simple steps. Follow these steps to ensure proper ventilation and minimize the risk of fire hazards:
- Start by unplugging the dryer and moving it away from the wall to access the exhaust duct.
- Disconnect the dryer from the exhaust duct by loosening the clamp or removing any screws that secure it.
- Visually inspect the exhaust duct for any signs of lint accumulation or restrictions. Use a flashlight if needed to illuminate hard-to-reach areas.
- If you spot any visible lint or debris, use a lint brush or vacuum attachment to remove the buildup. Make sure to clean all areas of the duct, including any bends or corners.
- In addition to cleaning the exhaust duct, check the exterior vent opening for any obstructions or lint buildup. Remove any debris that may be blocking the vent cover.
- After thoroughly cleaning the exhaust duct and vent opening, reattach the duct securely to the dryer.
- Finally, plug in the dryer and gently push it back into place, ensuring there is no kinking or restrictions in the exhaust duct.
Regularly checking and cleaning the exhaust duct is essential for a safe and efficient clothes dryer. By dedicating a little time to this maintenance task, you can enjoy peace of mind while using your dryer and minimize the risk of fire hazards.
This image is property of media-cldnry.s-nbcnews.com.
Inspecting and Replacing the Dryer Belt
Why is it important to inspect and replace the dryer belt?
The dryer belt plays a vital role in the proper function of your clothes dryer. It connects the motor to the drum, allowing for the rotation necessary to dry your clothes. Over time, the dryer belt can become worn, frayed, or broken, affecting the performance of the dryer and potentially causing damage to the drum or motor. Regularly inspecting and replacing the dryer belt ensures smooth operation and extends the lifespan of your appliance.
Signs indicating the need to replace the dryer belt
Several signs indicate that it may be time to replace the dryer belt. Be on the lookout for the following indicators:
- Noisy Operation: If you notice unusual noises, such as squeaking or grinding, coming from your dryer during operation, it could be a sign of a worn-out dryer belt.
- Drum Not Turning: If the drum is not rotating or is rotating irregularly, the dryer belt may be stretched or broken, hindering the proper function of your appliance.
- Visible Wear or Damage: Inspect the dryer belt visually for any signs of wear, fraying, or damage. If you notice any significant issues, it’s essential to replace the belt promptly to prevent further damage to the dryer.
If you notice any of these signs, it’s advisable to inspect and replace the dryer belt to ensure optimal performance and prevent potential damage.
Steps to inspect and replace the dryer belt
Inspecting and replacing the dryer belt is a task that can be done with some basic tools and following these steps:
- Safety First: Start by unplugging the dryer to ensure your safety throughout the inspection and replacement process.
- Access the Belt: Depending on the dryer model, you may need to remove the front or rear panel to access the dryer belt. Consult the manufacturer’s manual or online resources for specific instructions tailored to your dryer.
- Inspect the Belt: Once you have accessed the dryer belt, visually inspect it for any signs of wear, fraying, or damage. Check for any loose or broken threads that might affect the proper operation.
- Remove the Old Belt: If the dryer belt needs to be replaced, release the tension by either moving the tensioner or loosening the belt from the motor pulley. Carefully remove the old belt from the dryer drum and motor.
- Install the New Belt: Position the new dryer belt around the drum, ensuring it fits properly. Follow the diagram and instructions provided by the manufacturer to correctly route the belt. Reattach the belt to the motor pulley while maintaining the appropriate tension.
- Test the Belt: Before reassembling the dryer, rotate the drum by hand to ensure the belt is properly attached and aligned.
- Reassemble and Test: Reattach any panels that were removed to access the dryer belt. Plug in the dryer and run a test cycle to confirm that the drum is rotating smoothly and the new belt is functioning properly.
By regularly inspecting and replacing the dryer belt, you can ensure the optimal function of your clothes dryer and avoid potential issues that could lead to costly repairs.
Cleaning the Moisture Sensors
Why is it important to clean the moisture sensors?
Moisture sensors are an essential part of your clothes dryer, as they detect the level of moisture in your clothes and determine when they are dry. Over time, residue from fabric softeners, dryer sheets, and other laundry products can build up on the moisture sensors, affecting their accuracy and efficiency. Cleaning the moisture sensors is vital to maintain their proper function, ensuring your clothes are thoroughly dried while minimizing energy consumption.
How often should the moisture sensors be cleaned?
Cleaning the moisture sensors of your clothes dryer should be done at least every six months. However, if you notice longer drying times or inconsistent results, it’s advisable to clean the sensors more frequently. By incorporating this simple task into your regular maintenance routine, you can ensure the accurate performance of your dryer and avoid potential issues.
Steps to clean the moisture sensors
Cleaning the moisture sensors of your clothes dryer is a straightforward process. Follow these steps to maintain their accuracy and optimize the drying process:
- Unplug the Dryer: Before cleaning, make sure the dryer is unplugged to prevent any accidents or electric shocks.
- Locate the Sensors: The moisture sensors are generally located inside the dryer drum, near the lint trap or on the back wall. Consult your dryer’s manual or online resources for specific guidance on finding the sensors in your appliance.
- Clean the Sensors: Using a soft cloth or a cotton ball soaked in rubbing alcohol, gently scrub the surface of the moisture sensors. Pay attention to any visible residue or buildup and ensure it is thoroughly removed. Avoid using harsh chemicals or abrasive materials that could damage the sensors.
- Check for Damage: While cleaning, inspect the sensors for any signs of damage, such as scratches or cracks. If you notice any significant issues, consider contacting a professional for repair or replacement.
- Dry the Sensors: After cleaning, allow the sensors to air dry completely before reconnecting the dryer to the power source. This ensures that no residual alcohol or moisture remains, which could interfere with the sensor’s performance.
- Test the Sensors: Once the sensors are dry, run a test cycle with a small load of laundry to ensure their accuracy. Monitor the drying time and adjust settings if necessary.
Cleaning the moisture sensors is a simple yet crucial task to maintain the efficiency and reliability of your clothes dryer. By regularly cleaning and maintaining these sensors, you can confidently rely on your dryer’s ability to dry your clothes effectively while conserving energy.
This image is property of odorcrushstore.com.
Removing Built-Up Lint
Why is it important to remove built-up lint?
Removing built-up lint is essential to prevent potential fire hazards and maintain the optimal performance of your clothes dryer. Over time, lint can accumulate not only in the lint trap but also in the dryer vent, exhaust duct, and other components. Excessive lint buildup restricts airflow, causing the dryer to work harder and potentially overheat. This increases the risk of a fire and reduces the efficiency of the appliance. Regularly removing built-up lint helps maintain a safe and efficient dryer, protecting your home and ensuring thorough drying of your clothes.
How often should built-up lint be removed?
Built-up lint should be removed from various parts of your clothes dryer at least once a year. However, the frequency may vary depending on factors such as the frequency of dryer use, the size of laundry loads, and the types of fabrics dried. If you notice any signs of restricted airflow or a decline in dryer performance, it’s advisable to remove built-up lint more frequently. Regular maintenance and the removal of lint help to ensure the safety and efficiency of your clothes dryer.
Methods to remove built-up lint
There are several methods you can use to remove built-up lint from different parts of your clothes dryer. Follow these methods to effectively remove lint and maintain your dryer’s performance:
- Lint Trap: After each load, remove any visible lint from the lint trap by hand. Discard the lint properly. For a more thorough cleaning, use a lint brush or vacuum attachment to remove any lint stuck in the trap or surrounding area. Rinse the lint trap under running water to remove any remaining debris and ensure it is completely dry before placing it back into the dryer.
- Dryer Vent: Disconnect the dryer from the power source and detach the vent hose or duct from both the dryer and the exterior vent opening. Use a lint brush or vacuum attachment to remove lint and debris from the vent hose or duct. Clean the exterior vent opening, ensuring there are no obstructions. Reattach the vent hose or duct securely.
- Exhaust Duct: As mentioned earlier, follow the steps outlined in the “Checking and Cleaning the Exhaust Duct” section to effectively clean the exhaust duct and remove any built-up lint.
- Drum and Interior Surfaces: Periodically wipe down the drum and internal surfaces of the dryer with a microfiber cloth or soft lint-free cloth to remove any lint that may have accumulated. Use a mild detergent or a mixture of warm water and vinegar for stubborn stains or residue. Avoid abrasive cleaners that could damage the dryer’s finish.
- Professional Cleaning: Consider hiring a professional dryer vent cleaning service to perform a thorough cleaning of the ventilation system and other dryer components. They have the expertise and specialized equipment to remove built-up lint and debris from hard-to-reach areas.
By regularly removing built-up lint from your clothes dryer, you minimize the risk of fire hazards and ensure the efficient and safe operation of your appliance.
Preventing Fire Hazards
Why do clothes dryers pose a fire hazard?
Clothes dryers can pose a fire hazard due to the accumulation of lint and overheating. Lint is highly flammable, and when it builds up in the lint trap, ventilation system, or exhaust duct, the risk of a fire increases significantly. In addition, when a dryer’s ventilation system is clogged or obstructed, the dryer has to work harder, leading to potential overheating. The combination of heat, lint, and restricted airflow creates a perfect environment for a fire to ignite. It is crucial to take preventive measures to minimize the risk of fire hazards associated with clothes dryers.
Tips to prevent fire hazards
Taking proactive measures to prevent fire hazards associated with clothes dryers is of utmost importance. Follow these tips to minimize the risk of fire and ensure the safety of your home:
- Regular Maintenance: Implement a regular maintenance routine for your clothes dryer, including cleaning the lint trap, ventilation system, and exhaust duct. Clean the lint trap after every load and conduct thorough cleanings at least once a year.
- Proper Installation: Ensure that your clothes dryer is installed correctly, following the manufacturer’s guidelines. Venting systems should be properly connected and free of restrictions.
- Avoid Overloading: Avoid overloading the dryer with too many clothes. Overloading can restrict airflow and increase the chances of lint buildup. Follow the manufacturer’s guidelines for load capacity to ensure proper drying and ventilation.
- Proper Ventilation: Maintain proper ventilation for your dryer by using the shortest and straightest venting route possible. Regularly inspect the vent hose, duct, and exterior vent opening for any obstructions or damage.
- Avoid Drying Flammable Items: Never dry items that have come into contact with flammable substances, such as gasoline, solvents, or oils. Wash these items thoroughly before drying to minimize any fire risks.
- Monitor Drying Cycles: Keep an eye on the drying cycles and be aware of any changes in the dryer’s performance. If you notice longer drying times or unusual noises, it may indicate a clogged venting system or other issues that need immediate attention.
- Remove Lint Regularly: Remove lint from the lint trap after every load and clean the lint trap, ventilation system, and exhaust duct regularly to prevent lint buildup.
- Educate Household Members: Teach all household members about the importance of proper maintenance and fire prevention measures. Encourage them to follow best practices and inform you of any issues or concerns they may notice.
By following these essential tips and practicing regular maintenance, you can significantly reduce the risk of fire hazards associated with clothes dryers. Prioritizing fire prevention ensures the safety of your home and the well-being of your family.
Importance of regular maintenance for fire prevention
Regular maintenance of your clothes dryer plays a crucial role in preventing potential fire hazards. Neglecting proper maintenance can lead to lint buildup, restricted airflow, and overheating, significantly increasing the risk of a fire. By implementing a regular maintenance routine, you prioritize fire prevention and safeguard your home and loved ones. Here are some key reasons why regular maintenance is essential:
- Lint Removal: Regularly cleaning the lint trap, ventilation system, and exhaust duct removes lint and debris that can easily catch fire. By preventing the buildup of lint, you mitigate the risk of combustion and ensure proper airflow.
- Optimal Airflow: A clean and well-maintained dryer allows for optimal airflow, reducing the risk of overheating. Restricted airflow forces the dryer to work harder, generating excessive heat that can ignite lint and other combustible materials.
- Efficient Performance: With regular maintenance, your clothes dryer operates efficiently, drying your clothes in a timely manner. A poorly maintained dryer may struggle to dry laundry properly, leading to prolonged drying times and potential overheating.
- Extend Dryer Lifespan: Regular maintenance helps prolong the lifespan of your clothes dryer. By addressing any issues promptly and preventing excessive wear and tear, you reduce the likelihood of premature breakdowns and costly repairs or replacements.
- Peace of Mind: Practicing regular maintenance provides peace of mind, knowing that you have taken the necessary steps to ensure the safety of your home and family. Fire prevention measures are essential for a stress-free laundry experience.
By dedicating time to regular maintenance and following the recommended cleaning and inspection guidelines, you create a safer environment while maximizing the efficiency and longevity of your clothes dryer. Prioritize fire prevention and enjoy peace of mind knowing you are protecting your home and loved ones.


