Maintaining a clean and well-functioning oven is essential for ensuring that your meals are consistently cooked to perfection. In this article, we will provide you with practical tips and techniques to effectively clean and maintain your oven, allowing you to enjoy its optimal use for years to come. From simple cleaning solutions to preventive measures, you will discover everything you need to keep your oven in top-notch condition. So, let’s dive in and get your oven shining and performing at its best!

This image is property of assets.searshomeservices.com.
Cleaning the Interior
Removing oven racks
To begin cleaning the interior of your oven, start by removing the oven racks. These racks can easily accumulate grease and food residue, so it’s important to clean them separately. Take the racks out and wash them in warm, soapy water. Scrub them gently with a sponge or a soft brush to remove any stubborn dirt or grime. Once cleaned, rinse them thoroughly and let them dry completely before placing them back in the oven.
Scraping off burnt-on food
If you have stubborn burnt-on food stains inside your oven, you can scrape them off using a plastic spatula or a blunt knife. Be gentle to avoid scratching the interior surface. Scrape off as much residue as possible, but don’t worry if you can’t remove everything just yet, as we’ll address it in the next step.
Using oven cleaner
For a thorough cleaning, an oven cleaner can be used to tackle the remaining burnt-on food and grease stains. Follow the instructions on the cleaner carefully and apply it to the interior surfaces of the oven, focusing on the areas with the most buildup. Let the cleaner sit for a designated amount of time, usually around 15-30 minutes, to allow it to loosen the grime. Then, using a sponge or a non-abrasive cloth, wipe away the cleaner and the loosened dirt. Rinse the cloth frequently to avoid spreading the residue.
Cleaning the oven door
The oven door often accumulates grease and fingerprints, making it important to give it a good clean as well. Prepare a mixture of warm water and mild dish soap, and use a soft cloth or sponge to wipe down the exterior and interior of the oven door. Pay attention to any stains or spots and scrub gently to remove them. Avoid using harsh chemicals or abrasive materials on the door, as they can damage the surface. Finish by wiping the door with a clean, damp cloth to remove any soap residue and give it a streak-free shine.
Cleaning the Exterior
Wiping down the control panel
The control panel of your oven can also gather dust, fingerprints, and food splatters, so it’s essential to give it a regular wipe-down. Start by turning off the oven to avoid accidentally activating any settings. Then, dampen a soft cloth with water and mild dish soap or a gentle household cleaner. Gently wipe the control panel, taking care not to press too hard, as excessive moisture can damage the electronic components. Pay attention to the buttons and knobs, removing any debris or dried-on food residue.
Removing grease stains
The exterior of your oven may develop grease stains, particularly around the cooking area. To remove these stains, create a paste using baking soda and water. Apply the paste to the greasy areas and let it sit for about 15 minutes. Then, use a sponge or a cloth to scrub the stains gently in a circular motion. Baking soda is an effective natural cleaner that helps break down grease and absorb odors. Once you’ve removed the stains, wipe the exterior with a clean, damp cloth to remove any residue.
Polishing the surface
To give your oven’s exterior a polished look, you can use a stainless steel cleaner or a glass cleaner, depending on the material of your oven. Apply a small amount of the cleaner to a microfiber cloth and buff the surface in the direction of the grain or pattern. This will help remove any remaining smudges or streaks and give the oven a shiny finish. Remember to use a cleaner suitable for your oven’s material and to follow the manufacturer’s instructions.
Cleaning the oven knobs
The oven knobs are frequently touched and can accumulate dirt, grease, and food residue. To clean them, remove them carefully from the control panel by pulling them straight off. Fill a bowl with warm water and dish soap, and soak the knobs for a few minutes. Then, use a soft brush or a cloth to scrub away any dirt or grime. Rinse the knobs thoroughly, dry them with a clean cloth, and reattach them to the oven.

This image is property of cdn.apartmenttherapy.info.
Maintaining the Heating Element
Checking for signs of damage
The heating element is a crucial component of your oven, so it’s important to regularly inspect it for any signs of damage. Turn off the oven and allow it to cool completely before examining the heating element. Look for any visible cracks, breaks, or discoloration. If you notice any damage, it’s essential to replace the heating element promptly to ensure your oven functions properly.
Replacing a faulty heating element
If your inspection reveals that the heating element is faulty, it’s time to replace it. Consult your oven’s manual or contact the manufacturer for specific instructions on how to replace the heating element in your particular model. It’s generally recommended to seek professional assistance for this task, as working with electrical components can be dangerous. A certified technician will be able to safely replace the heating element and ensure your oven’s performance.
Cleaning the heating element
Regular cleaning of the heating element helps maintain its efficiency and prevents any residue from affecting its performance. Allow the heating element to cool completely before cleaning it. Gently wipe it down with a soft, damp cloth to remove any dust, debris, or food particles that may have accumulated. Avoid using abrasive materials or harsh chemicals on the heating element, as they can cause damage. Regular cleaning will extend the lifespan of the heating element and contribute to the overall functionality of your oven.
Preventing Food Spills
Using oven-safe cookware
One of the best ways to prevent food spills and drips in your oven is by using oven-safe cookware. Opt for dishes and baking pans that are specifically designed for use in ovens. These cookware items are typically made from materials that can withstand high temperatures without warping or releasing harmful chemicals. Avoid using glass dishes with a cold or frozen food directly into a preheated oven, as the sudden temperature change may cause them to shatter.
Covering food while cooking
Covering your food while cooking can help prevent splatters and spills in the oven. Use oven-safe lids or aluminum foil to cover dishes and pans, depending on the recipe’s requirements. This not only protects your oven from food debris but also helps retain moisture and heat, resulting in more flavorful dishes. If you’re using aluminum foil, make sure to mold it tightly around the dish to prevent any airflow that may affect the cooking process.
Placing a baking sheet on the bottom rack
To catch any potential drips or spills, place a baking sheet or an aluminum foil-lined tray on the bottom rack of your oven. This acts as a barrier, preventing any liquids or debris from directly falling onto the oven’s heating elements or interior surfaces. Remember to periodically clean the baking sheet or replace the aluminum foil to avoid the buildup of burnt-on food.
Using a liner or aluminum foil
If you’re concerned about maintaining a clean oven, you can use oven liners or aluminum foil on the rack beneath your food. These liners are designed to catch any drips or spills, preventing them from reaching the oven’s interior. However, make sure to follow the manufacturer’s instructions and ensure proper airflow within the oven. Improper usage of liners can impact the oven’s performance and potentially create a fire hazard.

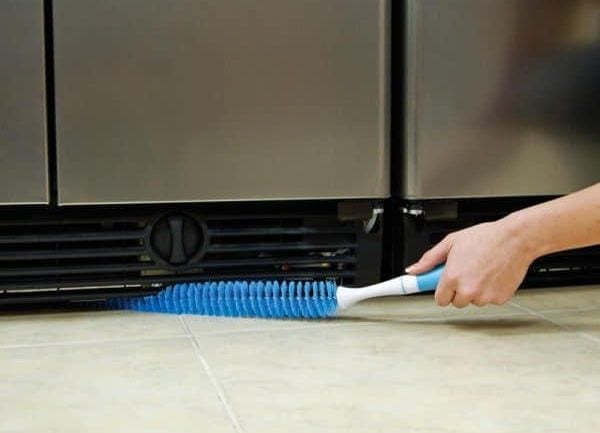
This image is property of cdn.apartmenttherapy.info.
Dealing with Odors
Removing burnt odors
Burnt odors can linger in your oven after a cooking mishap. To eliminate these unpleasant odors, start by removing any burnt residue from the oven’s interior using the cleaning methods mentioned earlier. After thorough cleaning, place a bowl filled with a mixture of equal parts water and vinegar inside the oven. Preheat the oven to a low temperature, around 250°F (121°C), and let it bake for about 30 minutes. The vinegar will help neutralize the burnt smell, leaving your oven fresh and odor-free.
Using natural remedies
If you prefer using natural remedies, there are a few options to help combat odors in your oven. Citrus fruits, such as lemons or oranges, can be effective in removing odors. Cut a lemon or orange into slices and place them on an oven-safe dish. Preheat your oven to a low temperature, around 200°F (93°C), and let the citrus slices bake for about 15-20 minutes. The natural oils released by the fruits will help freshen up the oven’s interior.
Using commercial odor absorbers
Commercial odor absorbers, such as baking soda or activated charcoal, can be used to eliminate unpleasant smells in your oven. Sprinkle a generous amount of baking soda or place an open box of baking soda or activated charcoal on one of the oven racks. Leave it inside the oven overnight or for a few hours to allow it to absorb the odors. Afterward, remove the baking soda or activated charcoal and discard it. This method is particularly useful for absorbing strong or persistent odors.
Leaving the oven door open
Allowing your oven to air out by leaving the door open after cleaning or cooking can help remove any lingering odors. The fresh airflow helps dissipate the odor molecules, leaving your oven smelling clean and fresh. However, ensure that the oven is completely cool before leaving the door open to prevent any accidents or burns.
Cleaning Oven Accessories
Cleaning oven racks
As mentioned earlier, oven racks should be removed and cleaned separately. Once you’ve taken them out of the oven, wash them in warm, soapy water. Pay extra attention to any stubborn food residues or grease stains. You can scrub them gently with a sponge or a soft brush to remove any buildup. Rinse the racks thoroughly and allow them to dry completely before placing them back in the oven.
Washing oven thermometers
If you use an oven thermometer to ensure accurate temperature readings, it’s essential to keep it clean as well. Most oven thermometers are dishwasher-safe, so you can simply place them in the dishwasher along with your other dishes. If your thermometer is not dishwasher-safe, wash it by hand using warm, soapy water. Rinse it thoroughly and dry it with a soft cloth or allow it to air dry. Make sure to store the thermometer in a safe place to prevent any damage.
Removing and cleaning the broiler pan
The broiler pan, located underneath the oven’s heating elements, can accumulate grease and drippings over time. To clean it, remove the pan carefully from the oven. If there is excessive grease buildup, scrape it off using a plastic spatula. Then, wash the broiler pan in warm, soapy water, using a sponge or a non-abrasive brush to remove any remaining grease or debris. Rinse the pan thoroughly and dry it before placing it back in the oven.
Cleaning the oven light cover
The oven light cover can become dirty or greasy due to cooking fumes and splatters. To clean it, first, ensure that the oven is turned off and cool to avoid any burns. Carefully remove the light cover by unscrewing it or following the manufacturer’s instructions. Wash the cover in warm, soapy water, and scrub it gently with a soft brush or sponge to remove any stains. Rinse it thoroughly and dry it before reinstalling it in the oven.

This image is property of www.realsimple.com.
Maintaining Oven Seals
Inspecting oven seals for damage
The oven seals, also known as gaskets, ensure a tight seal between the oven door and the oven cavity. Regularly inspect the oven seals for any signs of damage, such as cracks, tears, or gaps. Damaged seals can lead to heat loss and inefficient cooking. If you notice any issues with the seals, it’s important to replace them as soon as possible. Consult your oven’s manual or contact the manufacturer for specific instructions on how to replace the seals.
Replacing worn out oven seals
To replace the oven seals, start by removing the old ones. Gently pull them out from their slots and discard them. Clean the slots using a mild detergent and warm water to remove any dirt or residue. Then, take the new seals and insert them into the slots, ensuring a proper fit. Press them firmly to secure them in place. Make sure to follow the manufacturer’s instructions and guidelines for replacing the oven seals to ensure optimal performance.
Cleaning the oven seals
Regular cleaning of the oven seals helps maintain their integrity and ensure a proper seal. Wipe them down periodically using a soft cloth dampened with warm, soapy water. If there are any stubborn stains or grease buildup, use a non-abrasive brush or sponge to gently scrub the seals. Rinse them thoroughly and dry them with a clean cloth. Avoid using harsh chemicals or abrasive materials, as they can damage the seals.
Cleaning the Oven Vent
Removing and cleaning the vent cover
The vent cover is located either on the top or the back of your oven and allows airflow to circulate out of the oven cavity. To clean it, start by turning off the oven and ensuring that it’s cool. Carefully remove the vent cover by unscrewing or releasing any clips or tabs holding it in place. Soak the vent cover in warm, soapy water for a few minutes to loosen any dirt or grease. Use a soft brush or sponge to scrub away the debris. Rinse the cover thoroughly, dry it completely, and reattach it to the oven.
Using a vacuum or brush to remove debris
Aside from the vent cover, debris and dust can accumulate inside the oven vent itself. To remove any trapped debris, use a vacuum cleaner with a brush attachment or a long, flexible brush specifically designed for cleaning vents. Gently insert the vacuum nozzle or the brush into the vent and carefully maneuver it to loosen and suck or brush away any dirt or debris. Do this periodically to keep the vent free from any blockages or obstructions.
Maintaining the vent fan
The vent fan, located behind the vent cover, helps expel hot air and fumes from the oven. Regular maintenance of the vent fan ensures its efficiency and longevity. To clean the fan, first, ensure that the oven is turned off and cool. Remove any screws or clips securing the fan cover and carefully lift it away. Use a soft brush or a cloth to gently remove any dust or debris from the fan blades. Avoid using water or any liquid cleaners on the fan. Once cleaned, reattach the fan cover securely.

This image is property of unitappliances.com.au.
Addressing Common Issues
Dealing with uneven heating
If you notice that your oven is not heating evenly, it may be due to various factors. One common cause is a faulty heating element. Ensure the element is working correctly and replace it if necessary. Additionally, check for any obstructions in the oven vents that may disrupt airflow. Uneven heating can also occur if the oven racks are not properly positioned, so ensure they are leveled and positioned correctly.
Removing stubborn stains
Stubborn stains in your oven can be frustrating to remove. If regular cleaning methods are not effective, there are a few options you can try. Create a paste using baking soda and water, apply it to the stains, and let it sit for a few hours or overnight. Then, scrub the stains gently with a non-abrasive brush or sponge, and rinse thoroughly. Alternatively, some commercial oven cleaners are specifically formulated to tackle tough stains – follow the instructions carefully when using these products.
Fixing a malfunctioning control panel
If your oven’s control panel is not working correctly, it may be due to a malfunctioning component. First, check if there is a power issue by ensuring the oven is receiving electricity. If the power supply is fine, try resetting the oven by turning off the circuit breaker dedicated to the oven and then turning it back on after a few minutes. If the control panel still doesn’t function, it’s best to seek professional assistance from a qualified technician who can diagnose and repair the issue.
Getting rid of lingering odors
In case your oven still has lingering odors after cleaning, there are a few additional steps you can take. Place a bowl of coffee grounds inside the oven and let it sit overnight. Coffee has a natural odor-absorbing property that can help eliminate unwanted smells. Alternatively, you can sprinkle a generous amount of baking soda over the oven’s interior, leaving it overnight. The baking soda will absorb odors effectively. Remember to thoroughly clean the oven afterward to remove any residue.
Regular Oven Maintenance
Wiping down the oven regularly
Regularly wiping down your oven’s interior and exterior surfaces can prevent the buildup of dirt, grease, and stains. After each use, allow the oven to cool, then use a soft cloth or sponge to remove any loose debris or food spills. Rinse the cloth frequently to avoid spreading the residue. Additionally, it’s essential to wipe down the control panel, oven knobs, and door regularly to maintain a hygienic cooking environment.
Keeping the oven door clean
The oven door can become greasy or covered in fingerprints, which can be easily noticed, especially if it has a glass window. To keep the door clean, wipe it down regularly using a damp cloth or sponge. For stubborn grease stains, use a mild dish soap diluted in warm water. Avoid using harsh chemicals or abrasive materials that can damage the door’s surface. A clean oven door not only enhances the appearance of your kitchen but also ensures a clear view of your cooking progress.
Deep cleaning the oven periodically
In addition to regular wiping, it’s important to deep clean your oven periodically to remove any built-up grease and grime. Consider scheduling a deep clean every few months or as needed, depending on how heavily you use your oven. Follow the steps mentioned earlier for cleaning the interior of the oven to thoroughly remove any burnt-on food or stubborn stains. A periodic deep clean will help maintain optimal cooking performance and extend the lifespan of your oven.
Maintaining a clutter-free oven
Lastly, maintaining a clutter-free oven is essential for efficient cooking and easy maintenance. Avoid storing any items inside the oven when it’s not in use. Store cookware, baking sheets, and other utensils in designated cabinets or drawers to prevent them from blocking the oven vents or interfering with the heating elements. A clutter-free oven ensures proper airflow and reduces the risk of accidents or damage during cooking.
By following these comprehensive cleaning and maintenance tips, you can ensure that your oven remains in optimal condition for years to come. Regular cleaning, inspection, and care will not only enhance the efficiency and performance of your oven but also contribute to a clean and pleasant cooking experience. Remember to always refer to your oven’s manual or contact the manufacturer for any specific instructions or concerns regarding the cleaning and maintenance of your particular model. Happy cooking!