Having a dishwasher can make your life a whole lot easier, but what happens when it starts giving you trouble with draining? No worries, we’ve got you covered! In this article, you’ll find simple and effective solutions to tackle common dishwasher drainage issues. Whether it’s a clogged filter or a malfunctioning drain pump, we’ll walk you through each step to get your dishwasher up and running smoothly again. Say goodbye to standing water and hello to hassle-free dishwashing!

This image is property of assets.searshomeservices.com.
1. Clogged Drain Hose
1.1. Check for blockages
If you’re experiencing drainage issues with your dishwasher, the first thing you should check is the drain hose. Start by inspecting the hose for any visible blockages. Sometimes, food particles or debris can get lodged in the hose, preventing proper drainage.
1.2. Clean the drain hose
If you find any blockages in the drain hose, you can try cleaning it to restore proper drainage. Disconnect the hose from the dishwasher and the sink and use a long brush or a pipe cleaner to remove any debris. It’s also a good idea to run water through the hose to ensure it’s clear before reattaching it.
1.3. Replace the drain hose if necessary
If cleaning the drain hose doesn’t solve the drainage issue, it may be time to replace it. Over time, hoses can become cracked or worn, making it difficult for water to flow through. Look for any signs of damage, such as leaks or holes, and if necessary, purchase a new drain hose that is compatible with your dishwasher model.
2. Blocked Drain Filter
2.1. Remove and clean the drain filter
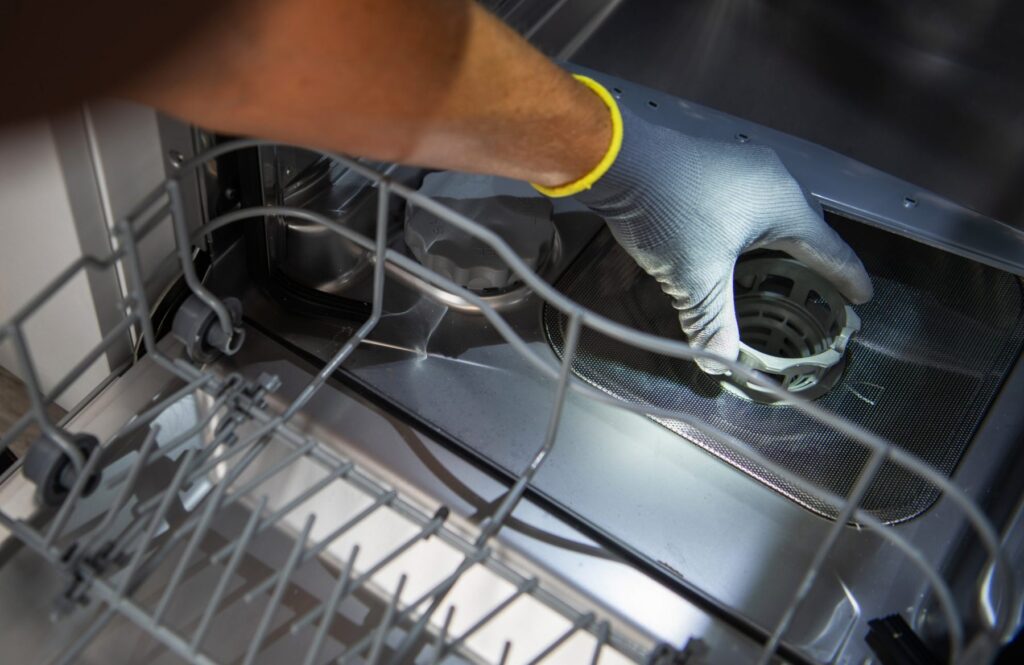
Another common cause of dishwasher drainage problems is a blocked drain filter. The drain filter is responsible for catching food particles and debris to prevent them from clogging the drain. Locate the drain filter, which is usually located in the back of the dishwasher near the bottom, and remove it. Rinse it under running water to remove any built-up grime or obstructions.
2.2. Check for debris in the drain pump
While you have the drain filter removed, take a moment to check for any debris in the drain pump. The drain pump is responsible for pumping water out of the dishwasher, so if it’s blocked, water won’t be able to drain properly. Use a flashlight to inspect the pump and remove any visible blockages, such as food particles or small objects.
2.3. Replace the drain filter if damaged
If the drain filter is damaged or shows signs of wear and tear, it’s a good idea to replace it. A damaged filter may not effectively catch debris, leading to clogs in the drain. Consult your dishwasher’s manual or contact the manufacturer to find the correct replacement filter for your model.
This image is property of stackheating.com.
3. Faulty Drain Pump
3.1. Test the drain pump for power
If your dishwasher is still not draining properly, it’s possible that the drain pump itself is faulty. Begin by testing the drain pump for power. Disconnect the dishwasher from the power source, remove the lower kick plate, and locate the drain pump. Using a multimeter, check for power at the pump’s terminals. If there is no power, you may need to replace the pump or check the wiring connections.
3.2. Inspect the drain pump for obstructions
Even if the drain pump is receiving power, it could still be obstructed. Check the pump for any visible blockages, such as debris or small objects. Clear any obstructions using a pair of tweezers or a small brush, being careful not to damage the pump in the process.
3.3. Replace the drain pump if it does not function properly
If the drain pump fails to pump water out of the dishwasher or if it’s making unusual noises, it may be time to replace it. Drain pumps can wear out over time or become clogged beyond repair. Consult your dishwasher’s manual or contact the manufacturer to find the correct replacement pump for your model.
4. Improper Installation
4.1. Check the dishwasher’s installation
Sometimes, drainage issues can be caused by improper installation of the dishwasher itself. Make sure the dishwasher is level and securely installed. Check that all the connections, including the drain line, are properly connected and not kinked or damaged.
4.2. Ensure proper drain line installation
The drain line is an essential part of the dishwasher’s drainage system. Check that the drain line is securely connected to the dishwasher and the drain pipe under the sink. Ensure there are no twists or kinks in the line that could impede proper drainage. If necessary, adjust the positioning of the drain line to ensure a smooth and unrestricted flow of water.
4.3. Adjust the dishwasher’s level
If the dishwasher is not level, it can affect the drainage process. Use a level to check the dishwasher’s alignment, both from side to side and front to back. If it’s not level, adjust the dishwasher’s feet or use shims to achieve the correct positioning. A level dishwasher will allow water to flow properly and prevent drainage issues.

This image is property of 333help.com.
5. Air Gap Issues
5.1. Inspect and clean the air gap
An air gap is a device that prevents backflow of water from the sink into the dishwasher. If you have an air gap installed, check that it is not clogged with debris. Remove the cap of the air gap and clean any built-up residue or blockages. A clear air gap will ensure proper drainage from the dishwasher.
5.2. Check the air gap hoses for kinks or blockages
The hoses connected to the air gap can sometimes become kinked or clogged. Inspect these hoses for any bends or blockages that could be obstructing the flow of water. Straighten out any kinks and remove any debris to restore proper drainage.
5.3. Replace the air gap if necessary
If the air gap is damaged or has become ineffective, it may need to be replaced. Consult your dishwasher’s manual or contact the manufacturer to find the correct replacement air gap for your model. A functional air gap is crucial for preventing any contamination of your dishwasher’s drainage system.
6. Garbage Disposal Connection
6.1. Verify the garbage disposal connection
Many dishwashers are connected to a garbage disposal unit, allowing food particles to be ground up and flushed away. Check that the connection between the dishwasher and the garbage disposal is secure and free of any blockages or leaks.
6.2. Remove any blockages or debris from the disposal
If the connection to the garbage disposal is clear, but you’re still experiencing drainage problems, inspect the disposal itself. Run water through the garbage disposal to flush out any debris or blockages that may be hindering the drainage process. Be sure to follow proper safety precautions when working with a garbage disposal.
6.3. Reconnect or replace the disposal if needed
If the garbage disposal is damaged or not functioning properly, it may need to be replaced. Consult a professional or the manufacturer’s instructions for guidance on reconnecting or replacing the unit. A malfunctioning disposal can greatly impact the dishwasher’s drainage capabilities.
This image is property of img.choice.com.au.
7. High Loop Installation
7.1. Confirm proper high loop installation
A high loop is an alternative to an air gap and helps prevent backflow of water from the sink into the dishwasher. Check that a high loop has been properly installed in the drain line. This involves creating a loop in the drain line and securing it to the underside of the countertop or sink cabinet.
7.2. Adjust or reinstall the high loop if needed
If the high loop is not properly positioned, it may not be effective in preventing backflow. Adjust the loop so that it reaches the correct height, typically higher than the sink’s water level. Secure the loop in place using zip ties or brackets to ensure it remains in the correct position.
7.3. Consider installing a high loop if not present
If your dishwasher does not have an air gap or a high loop installed, it’s a good idea to consider adding a high loop to prevent backflow. Consult a professional or refer to your dishwasher’s manual for specific instructions on how to install a high loop.
8. Check Valve Malfunction
8.1. Inspect the check valve for debris or damage
A check valve is a one-way valve that prevents water from flowing back into the dishwasher once it has drained. Inspect the check valve for any debris or damage that may be obstructing its proper function. Clean the valve using a brush or replace it if necessary.
8.2. Clean or replace the check valve if necessary
If the check valve is dirty or damaged, it may not function properly, leading to drainage issues. Clean the valve thoroughly to remove any dirt or debris that could be affecting its performance. If the valve is beyond repair, replace it with a new one that is compatible with your dishwasher model.
8.3. Ensure proper check valve installation
After cleaning or replacing the check valve, make sure it is installed correctly. Consult your dishwasher’s manual or refer to manufacturer instructions for the proper installation method. A properly functioning check valve is crucial for maintaining proper drainage in your dishwasher.

This image is property of empire-s3-production.bobvila.com.
9. Dishwasher Drain Solenoid
9.1. Test the drain solenoid for continuity
The drain solenoid is responsible for opening and closing the drain valve to allow water to flow out of the dishwasher. Test the solenoid for continuity using a multimeter. If the solenoid does not show continuity, it may be defective and in need of replacement.
9.2. Replace the drain solenoid if it fails the continuity test
If the drain solenoid fails the continuity test, it is likely the cause of the drainage issue and should be replaced. Consult your dishwasher’s manual or contact the manufacturer for the correct replacement part. Follow the manufacturer’s instructions to properly install the new solenoid.
9.3. Ensure proper installation of the drain solenoid
When installing the new drain solenoid, ensure it is properly connected and aligned with the drain valve. Follow the manufacturer’s instructions for the correct installation method. A well-functioning drain solenoid is essential for proper drainage in your dishwasher.
10. Plumbing Blockage
10.1. Check for plumbing blockages in the pipes
If none of the previous troubleshooting steps have resolved the drainage issue, it’s possible that there is a blockage in the plumbing pipes. Inspect the pipes for any clogs or obstructions. This may involve removing parts of the pipe or using a flashlight to visually check for blockages.
10.2. Clear any clogs using a plumbing snake or chemical drain cleaner
If you find a blockage in the plumbing pipes, you can try clearing it using a plumbing snake or a chemical drain cleaner. Follow the instructions provided with the plumbing snake or drain cleaner for safe and effective usage. Remember to wear protective gloves and eyewear when working with chemicals.
10.3. Consider calling a professional plumber if the blockage persists
If you’re unable to clear the blockage yourself or if it continues to persist, it’s time to call a professional plumber. A plumber will have the expertise and tools necessary to diagnose and resolve any plumbing blockages that may be causing the dishwasher drainage issue.


