
Are you looking for creative ways to make your existing appliances more eco-friendly? We all want to do our part in protecting the environment, and luckily there are simple DIY projects that can help us achieve that goal. In this article, we will explore some innovative ideas and step-by-step instructions on how to transform your appliances into sustainable and energy-efficient powerhouses. From clever hacks to eco-conscious modifications, these projects will not only help reduce your carbon footprint but also save you money in the long run. Whether you’re a seasoned DIY enthusiast or just starting out, there’s something here for everyone to make a positive impact on the planet. So grab your tools and let’s get started on our journey towards a greener, more sustainable future.
Shop Sustainable Appliances on Amazon Here
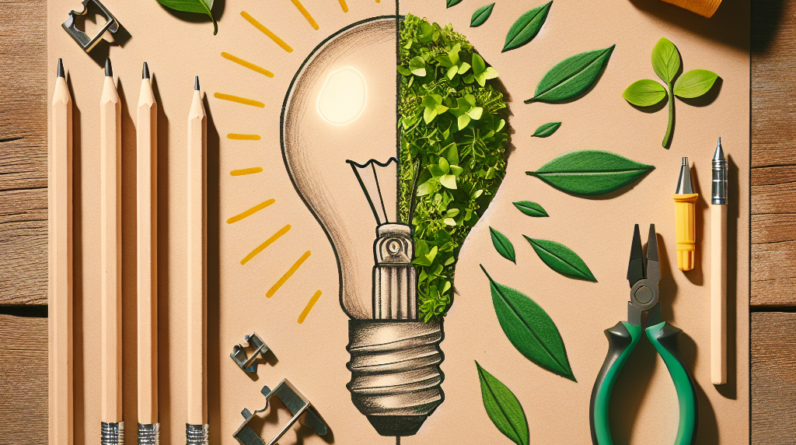
1. Energy-Efficient Lighting
1.1 Replacing Incandescent Bulbs
One of the simplest and most effective ways to make your home more energy-efficient is by replacing traditional incandescent bulbs with energy-efficient alternatives. Incandescent bulbs consume a significant amount of energy and produce a lot of heat, making them highly inefficient. By switching to compact fluorescent lamps (CFLs) or light-emitting diodes (LEDs), you can save a substantial amount of energy and reduce your electricity bills.
CFLs are a cost-effective option that can provide substantial energy savings. They use around 70-80% less energy than traditional incandescent bulbs and last significantly longer. They may take a few moments to reach their full brightness, but the energy savings outweigh this slight inconvenience.
LED bulbs, on the other hand, are even more energy-efficient and have a longer lifespan than CFLs. They are highly durable, produce very minimal heat, and are available in a wide range of colors and brightness levels. Although LED bulbs may have a higher upfront cost, their energy savings and longevity make them a worthwhile investment in the long run.
1.2 Installing LED Bulbs
If you haven’t already, consider installing LED bulbs throughout your home. LED bulbs are incredibly energy-efficient, using up to 80% less energy than incandescent bulbs. They also last much longer, with an average lifespan of 10,000-50,000 hours compared to the 1,000 hours of a typical incandescent bulb. This means fewer replacements and less waste.
When choosing LED bulbs, pay attention to the lumens rather than the wattage. Lumens measure brightness, while watts indicate energy consumption. LED bulbs with lower wattage can still provide the same or even greater amount of brightness as higher wattage incandescent bulbs. Look for bulbs with the Energy Star label to ensure they meet strict energy efficiency guidelines.
Installing LED bulbs is a simple DIY project. Start by turning off the power to the light fixture, removing the existing bulb, and screwing in the LED bulb. It’s crucial to handle LED bulbs with care, avoiding direct contact with the LED chips and using caution not to overtighten the bulb.
1.3 Adding Dimmers
Another way to make your lighting more energy-efficient is by adding dimmers to your light switches. Dimmers allow you to adjust the brightness of your lights according to your needs, providing flexibility and reducing energy waste. Whether you want bright lighting for work or a cozy ambiance for relaxation, dimmers allow you to customize the light output.
Adding a dimmer switch is a straightforward DIY project that requires basic electrical knowledge. Before beginning, make sure to turn off the power to the light switch at the circuit breaker. Remove the existing switch cover and switch, and follow the instructions provided with the dimmer switch to install it correctly. Once installed, you can adjust the brightness of your lights by sliding or rotating the dimmer switch.
Shop Sustainable Appliances on Amazon Here
2. Insulating Appliances
2.1 Insulating Water Heater
Insulating your water heater is an effective way to reduce heat loss and improve energy efficiency. Water heaters can be a significant source of energy consumption, especially if they are not properly insulated. By adding insulation, you can minimize heat loss and reduce the frequency of the water heater cycling on to maintain the desired temperature.
Start by checking if your water heater has an insulation blanket or jacket installed. If not, purchase an insulation blanket specifically designed for water heaters from a local hardware store. Make sure to choose a blanket with an appropriate R-value, indicating its insulating effectiveness. Follow the manufacturer’s instructions to wrap the blanket around the water heater, being careful to avoid covering the temperature and pressure relief valve.
2.2 Insulating Fridge and Freezer
Did you know that your refrigerator and freezer can benefit from insulation as well? Proper insulation can help maintain a consistent temperature inside the unit, reducing the workload on the compressor and improving energy efficiency. This can result in significant energy savings over time.
To insulate your fridge and freezer, start by unplugging the unit and emptying its contents into a cooler. Locate the access panels and remove them to expose the appliance’s inner walls. Inspect the existing insulation and replace any damaged or deteriorated sections. You can use foam insulation boards or fiberglass insulation to fill in gaps and reinforce the insulation. Be sure to cover the insulation with a vapor barrier to prevent moisture buildup. Finally, reinstall the access panels and plug the appliance back in.
2.3 Insulating Oven and Stovetop
Insulating your oven and stovetop can help reduce heat loss and wasted energy while cooking. Poor insulation can cause excessive heat loss into the surrounding environment, leading to longer cooking times and increased energy consumption. By properly insulating these appliances, you can create an energy-efficient cooking environment and save on your energy bills.
To insulate your oven, start by turning it off and allowing it to cool completely. Remove the oven door by following the manufacturer’s instructions. Apply oven door insulation tape or fiberglass insulation rope around the edges of the oven door to create a tight seal when closed. Replace the door and ensure it is properly aligned and securely attached.
For the stovetop, you may consider using heat-resistant stove gaskets or heat-reflecting foil insulation to prevent heat loss between the stovetop and the countertop. This will help retain heat and ensure more efficient cooking.
3. Upgrading Thermostats
3.1 Installing Programmable Thermostats
Upgrading your thermostat to a programmable one is a simple yet effective way to make your heating and cooling system more energy-efficient. Programmable thermostats allow you to schedule temperature adjustments based on your daily routine, ensuring your home is always comfortable without unnecessary energy consumption.
To install a programmable thermostat, start by turning off the power to your heating and cooling system at the circuit breaker. Remove the existing thermostat cover and disconnect the wiring. Follow the manufacturer’s instructions to install the new thermostat, ensuring you connect the wires correctly.
Once installed, program your thermostat according to your desired temperature settings. Set lower temperatures during periods when you’re away from home or sleeping, and higher temperatures when you’re active and in need of heating or cooling. This will help reduce energy waste and optimize comfort.
3.2 Using Smart Thermostats
Smart thermostats take energy efficiency to the next level by allowing you to remotely control and monitor your heating and cooling system through your smartphone or other connected devices. With smart thermostats, you can make real-time adjustments to your home’s temperature settings, even when you’re away.
To utilize a smart thermostat, start by ensuring your heating and cooling system is compatible with the smart thermostat model you choose. Follow the manufacturer’s instructions to install the smart thermostat, connecting it to your home’s Wi-Fi network. Once connected, download the corresponding app and set up your preferences, including temperature schedules, energy-saving modes, and temperature alerts.
By using a smart thermostat, you can optimize your energy usage by adjusting your home’s temperature based on factors such as occupancy and outdoor weather conditions. This level of control can lead to significant energy savings and improved comfort.
4. Adjusting Temperature Settings
4.1 Optimizing Water Heater Temperature
Adjusting the temperature settings of your water heater is a simple DIY project that can result in energy savings. The default temperature setting on most water heaters is often unnecessarily high, leading to energy waste and potential scalding risks. By lowering the temperature, you can reduce energy consumption without sacrificing comfort.
Start by identifying the temperature dial on your water heater. Use a thermometer to measure the temperature of the water at the nearest faucet. Adjust the temperature setting gradually, aiming for a target temperature of around 120 degrees Fahrenheit (49 degrees Celsius). This temperature is considered safe for daily activities such as showering and dishwashing while minimizing energy waste.
4.2 Adjusting Fridge and Freezer Temperatures
Properly adjusting the temperature settings of your refrigerator and freezer can improve energy efficiency and preserve food quality. Setting the temperature too low can lead to unnecessary energy consumption, while setting it too high can compromise food safety.
To adjust the temperature settings, refer to the user manual or locate the temperature control dials inside the units. Set the refrigerator temperature to around 37-40 degrees Fahrenheit (3-4 degrees Celsius) and the freezer temperature to 0-5 degrees Fahrenheit (-18 to -15 degrees Celsius). These temperature ranges ensure optimal food storage while minimizing energy usage.
4.3 Setting Proper Oven Temperatures
Setting the proper oven temperature is crucial for efficient cooking while minimizing energy waste. Inaccurate oven temperatures can lead to overcooking, uneven cooking, and longer cooking times. By calibrating and adjusting the temperature settings, you can achieve more accurate and energy-efficient cooking results.
To determine the accuracy of your oven’s temperature, you can use an oven thermometer. Preheat your oven to a specific temperature, then place the oven thermometer inside and allow it to stabilize. Compare the reading on the oven thermometer to the set temperature on your oven. If there’s a significant difference, you may need to recalibrate your oven.
Consult your oven’s user manual for instructions on calibrating the temperature settings. Typically, you can adjust the oven’s temperature by turning the temperature calibration dial or using the oven’s control panel. Follow the instructions carefully to ensure the proper calibration.
5. DIY Solar Panels
5.1 Installing Solar Panels on Roof
Harnessing solar energy by installing solar panels is a fantastic DIY project that can significantly reduce your carbon footprint and energy bills. Solar panels convert sunlight into electricity, providing a renewable and sustainable source of energy for your home.
Before installing solar panels, conduct a thorough assessment of your roof’s suitability for solar panel installation. Consider factors such as roof orientation, shading from trees or nearby structures, and the structural integrity of your roof. You may want to consult a professional to ensure solar panels are a viable option for your specific circumstances.
If your roof is suitable for solar panels, begin by obtaining the necessary permits and approvals from your local authorities. Familiarize yourself with the installation process by researching and following reputable DIY solar panel installation guides or videos. It’s important to emphasize that working with electricity and climbing on roofs can be dangerous. If you are not comfortable with these tasks, it’s recommended to hire a professional solar panel installer to ensure safety and proper installation.
5.2 Building Solar Water Heaters
Building a solar water heater is a practical DIY project that allows you to utilize the power of the sun to heat your water, reducing energy consumption and costs. Solar water heaters work by collecting sunlight and transferring the heat to the water storage tank.
To build a solar water heater, you will need a solar collector or panel, a water storage tank, and appropriate plumbing connections. The solar collector should be positioned in an area that receives maximum sunlight, such as a south-facing rooftop or an open space in your yard.
There are numerous DIY solar water heater designs available, ranging from simple batch heaters to more complex active systems with circulation pumps. Research different designs and select one that fits your needs and skill level. You can find detailed step-by-step guides and videos online to help you in the construction process. Additionally, consider consulting a professional or attending a workshop to ensure proper safety measures and efficient design implementation.
6. Water-Saving Devices
6.1 Installing Low-Flow Showerheads
Conserving water is an essential aspect of being eco-friendly, and one way to achieve this is by installing low-flow showerheads. Traditional showerheads allow water to flow at a high rate, resulting in excessive water usage and energy waste associated with heating the water. Low-flow showerheads restrict the flow of water while maintaining adequate pressure, helping you save both water and energy.
To install a low-flow showerhead, start by removing the existing showerhead using a wrench or pliers. Make sure to protect the showerhead surface to avoid any damage. Clean the shower arm thread to ensure a proper seal with the new showerhead. Apply plumber’s tape to the shower arm threads to prevent leaks, then screw on the new low-flow showerhead. Use a wrench or pliers to tighten the showerhead securely.
6.2 Adding Faucet Aerators
Adding faucet aerators to your faucets is another effective way to save water and improve water efficiency. Faucet aerators introduce air into the water stream, reducing the flow rate while maintaining usability. This helps lower water consumption without sacrificing the functionality of your faucets.
To add faucet aerators, start by unscrewing the existing aerator from the faucet spout. Clean any debris or sediment from the aerator or spout openings. Choose a faucet aerator with the appropriate flow rate for your needs, such as 1.0 or 1.5 gallons per minute (gpm). Apply plumber’s tape to the aerator threads to prevent leaks, then screw on the new aerator. Use your hand or pliers to secure the aerator tightly.
6.3 Implementing Dual-Flush Toilet System
Toilets are notorious for their water consumption, but by implementing a dual-flush system, you can significantly reduce water waste while maintaining proper functionality. Dual-flush toilets have two flush options: a full-flush for solid waste and a reduced-flush for liquid waste. This allows you to choose the appropriate water volume for each flush, resulting in substantial water savings.
To implement a dual-flush system, you can either install a dual-flush retrofit kit or replace your existing toilet with a new dual-flush model. Retrofit kits typically come with a dual-flush valve, buttons or levers for the different flush options, and installation instructions. Follow the instructions carefully to ensure proper installation and functionality. If replacing the entire toilet, consider consulting a professional plumber to ensure a proper fit and installation.
7. Insulating Pipes
7.1 Adding Pipe Insulation
Insulating your pipes helps prevent heat loss or gain, reducing energy waste associated with hot water distribution and improving the efficiency of your heating system. Pipe insulation keeps the water temperature more stable as it travels through your plumbing system, leading to faster hot water delivery and minimizing the need for reheating.
To add pipe insulation, start by choosing the appropriate insulation material for your pipes. Foam pipe sleeves or fiberglass pipe wrap are commonly used for insulation purposes. Measure the length and circumference of the pipes you want to insulate, and cut the insulation material accordingly.
Carefully install the pipe insulation by sliding it onto the pipe, ensuring a snug fit. Use duct tape or insulation tape to secure any seams or gaps in the insulation. Pay special attention to areas of the pipes that are exposed to colder temperatures, such as in unheated basements or crawl spaces. Properly insulated pipes contribute to energy savings while also preventing frozen pipes during cold weather.
7.2 Insulating Hot Water Pipes
Insulating your hot water pipes specifically can help reduce heat loss and improve the overall efficiency of your hot water system. Hot water pipes that are not properly insulated can lose a significant amount of heat as the hot water travels from the water heater to the faucets, resulting in wasted energy and increased gas or electricity bills.
To insulate hot water pipes, follow the same steps as for general pipe insulation. Measure the length and circumference of the hot water pipes, and cut the insulation material accordingly. Slide the insulation onto the pipes, making sure to minimize any gaps or seams. Secure the insulation with tape, and pay particular attention to areas near the water heater and where the pipes are exposed to colder temperatures.
By insulating your hot water pipes, you can reduce heat loss and increase the overall efficiency of your hot water system. This means faster hot water delivery when you turn on the tap and less energy wasted in maintaining the desired water temperature.
8. Air Leak Sealing
8.1 Weatherstripping Windows and Doors
Air leaks around windows and doors can significantly affect the energy efficiency of your home, leading to drafts, temperature inconsistencies, and increased energy consumption. Weatherstripping is a cost-effective and straightforward DIY solution to seal these gaps and minimize air leakage.
Start by identifying air leaks around windows and doors. Run your hand along the frames and edges, feeling for any drafts. Look for gaps or cracks where outside air can enter or conditioned air can escape. Common areas requiring weatherstripping include window sashes, door frames, and thresholds.
Once you’ve identified the areas that need weatherstripping, choose the appropriate type of weatherstripping material. Options include adhesive-backed foam tape, V-strip, door sweeps, or silicone rubber gaskets. Measure the lengths needed for each area and cut the weatherstripping material accordingly.
Clean the surfaces where the weatherstripping will be applied, ensuring they are free from dust and debris. Peel off the backing on the adhesive-backed foam tape or apply an appropriate adhesive to the weatherstripping material. Press the weatherstripping firmly into place, sealing the gaps and creating a tight seal against air leakage. Repeat the process for all areas that required weatherstripping.
8.2 Sealing Duct Leaks
Duct leaks can significantly impact the efficiency of your heating and cooling system, leading to wasted energy and compromised comfort. Sealing duct leaks is a DIY project that can be accomplished with duct sealant (mastic) and/or metal-backed tape (not duct tape) to prevent air leaks and optimize the performance of your HVAC system.
Start by locating the duct leaks. Common areas where leaks occur include connections at vents, joints, and seams. Use a flashlight to visually inspect the ductwork or use your hand to feel for air leakage while the HVAC system is running.
Once you’ve identified the leaks, ensure the surfaces are clean and free from dust or debris. Apply the duct sealant (mastic) with a brush or gloved hand, covering the leaks and surrounding areas. Alternatively, you can use metal-backed tape to seal the leaks, ensuring the tape is securely adhered to the ductwork and covering the entire leak area.
Properly sealing duct leaks can significantly improve the efficiency of your HVAC system, reducing energy waste, and improving overall comfort. If you’re uncertain about locating or sealing duct leaks, consider consulting a professional HVAC technician.
8.3 Insulating Attics and Crawl Spaces
Insulating your attic and crawl spaces is essential for maintaining an energy-efficient home. Poor insulation in these areas can allow hot or cold air to penetrate your living space, leading to increased heating and cooling costs. By properly insulating the attic and crawl spaces, you can create a thermal barrier and minimize temperature transfer.
Before insulating, assess the existing insulation, if any, and determine if it needs to be replaced or supplemented. Research the recommended R-value for your geographical area to ensure proper insulation effectiveness. R-value is a measure of thermal resistance, with higher values indicating better insulation.
If the attic is unfinished, you can install additional insulation between the ceiling joists or on the attic floor. This can be achieved using insulation batts or rolls that fit snugly between the joists or blown-in insulation that fills the spaces more effectively. Pay attention to areas such as attic hatches, pipes, and recessed lighting fixtures, ensuring they are properly sealed and insulated.
Crawl spaces can be insulated with insulation batts or rolls, similar to attic insulation. This insulation should be applied to the crawl space walls, ensuring a continuous thermal barrier. Additionally, consider using a vapor barrier to prevent moisture buildup and improve overall insulation effectiveness.
Properly insulating the attic and crawl spaces can lead to significant energy savings, improved indoor comfort, and a more eco-friendly home.
9. Recycling and Proper Disposal
9.1 Recycling Old Appliances
When looking to make your existing appliances more eco-friendly, it’s essential to address proper disposal or recycling of any old or inefficient appliances you replace. Recycling old appliances prevents unnecessary landfill waste and allows for the recovery and reuse of valuable materials.
Start by researching local recycling programs or facilities that accept old appliances. Many municipalities offer recycling initiatives or scheduled pickup services specifically for appliances. Contact these organizations to understand their requirements and arrange for the appliance’s recycling or pickup.
If there are no local recycling options available, you may consider contacting appliance retailers or manufacturers. Some organizations have take-back programs, where they accept old appliances for proper disposal or recycling when you purchase new appliances from them. Be sure to inquire about their recycling policies before making any commitments.
Recycling old appliances contributes to reducing environmental impact, conserving resources, and promoting a circular economy. By doing your part, you actively contribute to a more sustainable future.
9.2 Proper Disposal of Batteries and Electronics
Properly disposing of batteries and electronics is crucial for minimizing environmental contamination and promoting responsible waste management. Batteries contain hazardous materials such as lead, mercury, and cadmium, which can seep into the soil and water if not disposed of correctly. Electronics, known as e-waste, also contain valuable materials and toxic substances that can harm the environment if not recycled properly.
When it comes to battery disposal, start by separating batteries according to their type (e.g., alkaline, lithium-ion, nickel-cadmium). Many communities have designated drop-off locations or recycling centers that accept and properly dispose of batteries. Some retailers also offer recycling programs for batteries, so consider checking with local electronics, home improvement, or office supply stores.
For electronic waste, research local e-waste recycling programs or facilities. Many municipalities have specific drop-off days or locations where you can dispose of old electronics responsibly. Some manufacturers and retailers also offer take-back programs for electronic products, ensuring they are recycled or disposed of correctly. Contact these organizations or check their websites for specific instructions and requirements.
Proper disposal of batteries and electronics is essential for safeguarding the environment and preventing potential health hazards. By disposing of these items responsibly, you ensure that valuable materials are recovered and reused while minimizing pollution and reducing waste.
10. Energy Monitoring and Control
10.1 Using Energy Monitoring Devices
Monitoring your energy usage is a crucial step towards making your home more eco-friendly. Energy monitoring devices provide real-time information about your energy consumption, allowing you to identify areas of improvement, track the effects of energy-saving measures, and make informed decisions about reducing energy waste.
Energy monitoring devices come in various forms, ranging from simple plug-in energy monitors to sophisticated whole-house energy monitoring systems. Plug-in monitors are easy to use and provide consumption data for individual appliances or devices. Whole-house energy monitors typically require professional installation and provide comprehensive energy usage information for your entire home.
To use an energy monitoring device, follow the manufacturer’s instructions to install or connect the device to your electrical system. Set up the device according to your preferences, including preferred measurements (e.g., energy usage, cost, carbon emissions), alerts, and data logging frequencies. Monitor and analyze the data regularly to identify opportunities for energy conservation and track your progress over time.
10.2 Implementing Energy Usage Control Systems
Energy usage control systems take energy monitoring a step further by allowing you to actively control and manage your home’s energy usage. These systems integrate with various appliances, lighting, and heating/cooling systems, providing centralized control and automation options.
Smart home automation systems, for example, allow you to create energy-saving schedules and rules for your devices. You can program lights and thermostats to automatically adjust based on occupancy, outdoor conditions, or time of day. Additionally, energy management systems may include features such as load shedding, where non-essential appliances are temporarily turned off during peak energy demand periods.
When implementing energy usage control systems, start by researching the available options and choosing a system that suits your needs and budget. Follow the manufacturer’s instructions to install and set up the system, integrating it with your existing devices and appliances. Take advantage of the system’s features and functionalities to optimize energy usage and minimize waste.
Implementing energy usage control systems helps you take an active role in managing your home’s energy consumption. By utilizing automation and smart controls, you can maximize energy savings, improve comfort, and create a more eco-friendly living environment.
